
TABLE OF CONTENTS
- Summary
- Before you start
- Types of emails
- How to customise a template
- Template structure
- Dynamic fields
- Case-level customisation
- Best practice tips
Summary
The First AML platform enables users to send emails to clients directly, requesting them to complete electronic identity verification forms (EIV, used to collect ID, personal details, and optionally biometric data) and/or provide specific documents via a secure weblink (Requirements).
First AML provides default templates for both the Verification and Requirements emails. These templates are designed to provide clear context to your clients about the purpose of the email and what action is required.
Before you start
- Default or Office-level templates (in Settings) can only be customised by Compliance Admins.
- Case-level customisation (personalising an individual email as you send it) is available to all users, without affecting the saved default template.
Types of emails
Verification email (EIV)
This email is used when requesting details to complete an individual's verification checks: collecting their ID, personal details, and optionally biometric data. It includes a link to the electronic identity verification form.
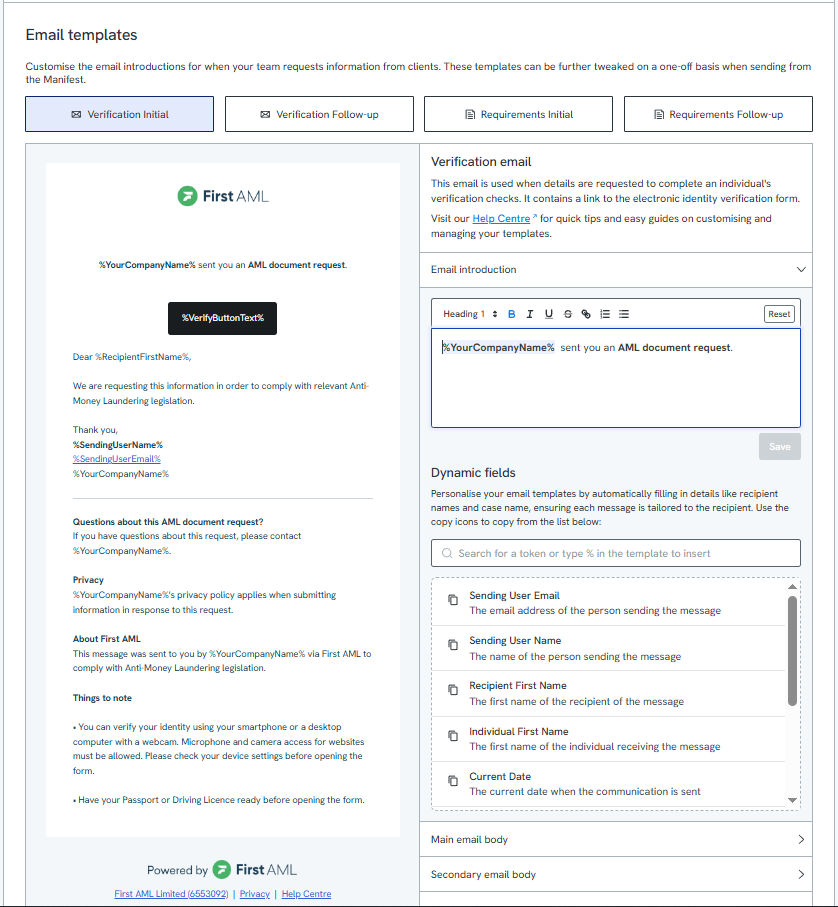
Sending the Verification email within a case:
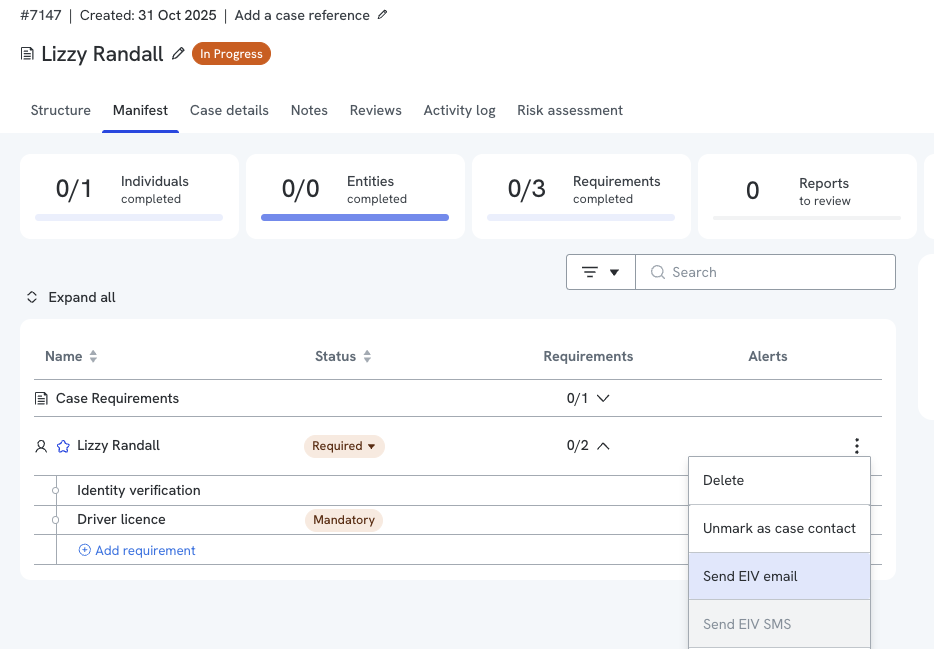
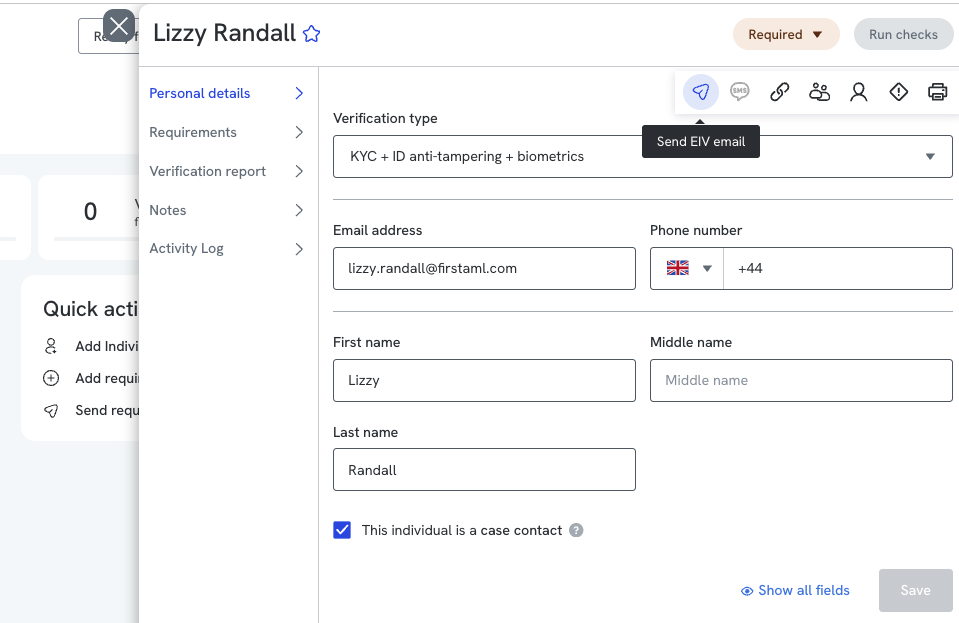
You can send the Verification email from two places:
- From the Manifest tab, click the three-dot menu next to the individual's name, then select Send EIV email (or Send EIV SMS to text it instead).
- Alternatively, open the individual's profile, and click the paper plane icon at the top of the Personal details panel (hover over it to confirm it says "Send EIV email")
Click on the images to expand
 |  |
Requirements email
This email is used when sending requirements to individuals. It includes a link to the secure web form where they can upload documents and provide other information.
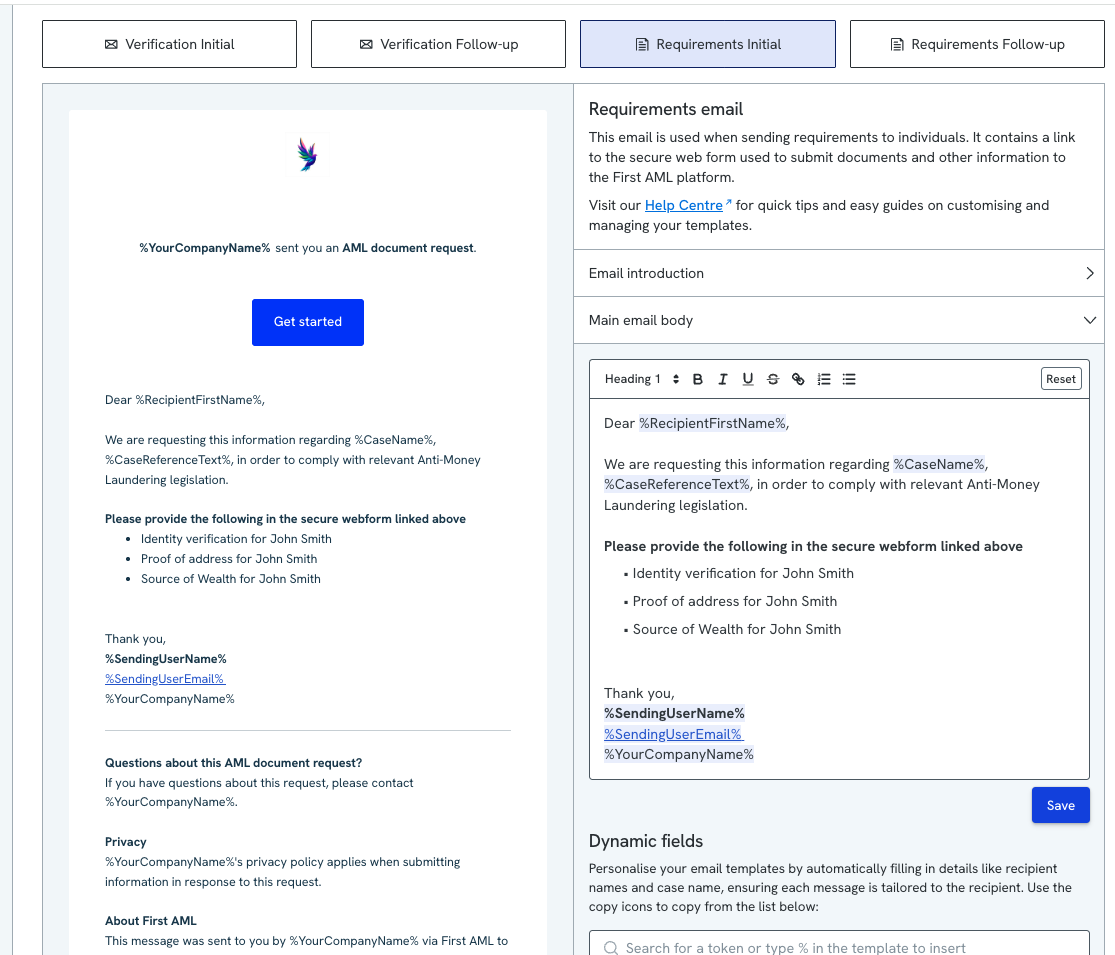
Sending Requirements within a case:
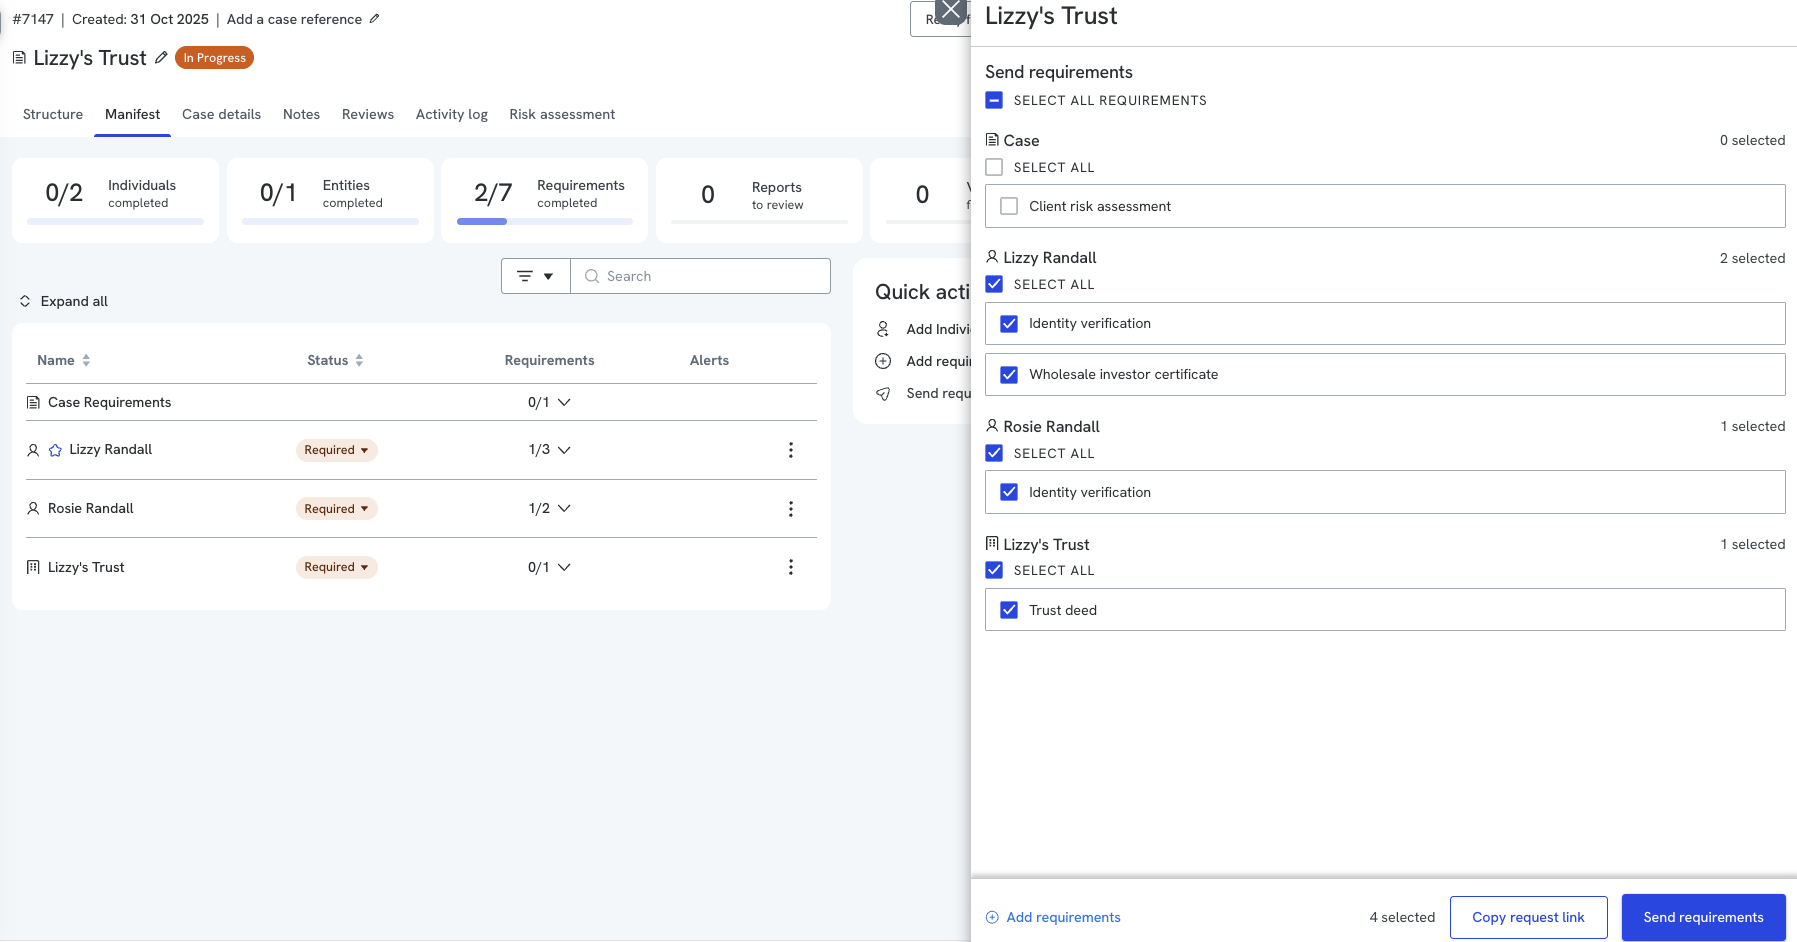
- From the Manifest tab, click Send requirements under Quick actions.
- In the panel that opens, select the requirements you want to send, either individually or via Select all requirements. Requirements are grouped by Case, and by each individual or entity in the case.
- Click Send requirements, or Copy request link to copy a link instead of sending directly.
Follow up template
You can also update the email template used for our automated follow-up reminders. These follow-up emails can contain additional context or guidance that isn't included in the initial message. To make changes, simply select either the Verification Follow-Up or Requirement Follow-Up template and edit as needed.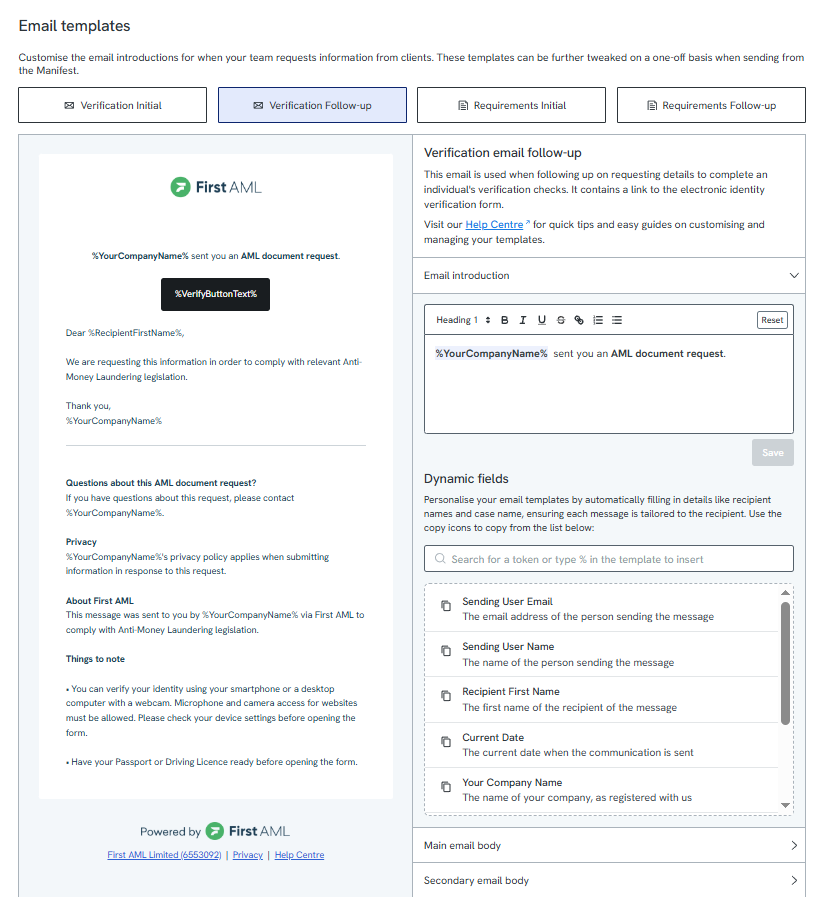
How to customise a template
Navigate to Settings > Email templates.
- Select the relevant template (Verification or Requirements).
- (Optional) Select which office you wish to adjust
Updates to 'Default' will apply to all offices without personalisation - Choose the section you want to edit: Email introduction, Main email template, or Secondary email body.
- Use the free text box to update the wording. You can:
- Delete or replace existing text
- Add new text
- Apply formatting such as bold, italics, or font size adjustments
- Insert dynamic fields to personalise the email
- Save your changes. Updates are automatically applied to all new cases for that office.
Template structure
Each email template is divided into three sections:
Email introduction – displays above the main email body, typically used for a short greeting or summary
Main email template – forms the core content and purpose of the email
Secondary email body – appears below the main content, often used for additional instructions or disclaimers
All sections of the template can be edited. Changes, once saved, will automatically apply to all new cases created under that office.
Dynamic fields
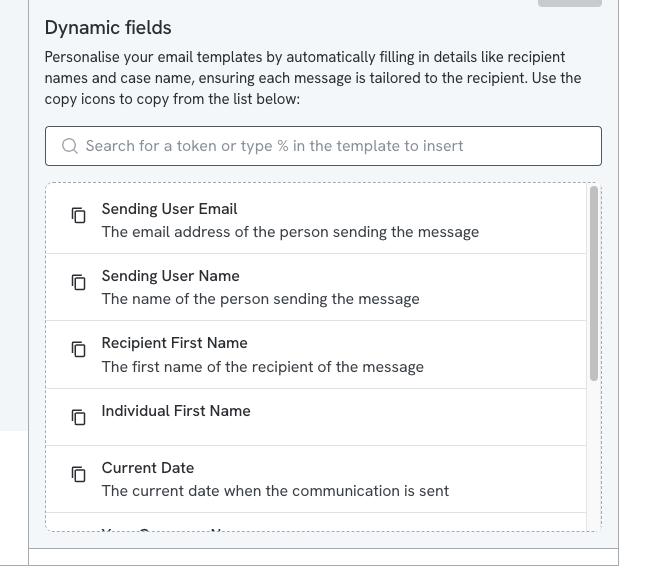
Dynamic fields help personalise your email templates by automatically inserting key details such as the recipient’s name or the case name.
Field | Description |
|---|---|
Sending User Email | The email address of the person sending the message |
Sending User Name | The name of the person sending the message |
Recipient First Name | The first name of the recipient of the message |
Individual First Name | The first name of the individual receiving the message |
Current Date | The current date when the communication is sent |
Your Company Name | The name of your company, as registered with us |
Case Number | The name of the case |
Case Reference Text | Your unique identifier or reference number for the case |
Case Requestor | The user who requested the case |
Use the copy icons to copy and paste dynamic fields into your email templates.
Case-level customisation
While only Compliance Admins can update the default templates in Settings, all users can personalise individual emails when sending them from a case. This allows flexibility to tailor messaging for a specific client or situation, without affecting the saved default template.
Best practice tips
- Review your templates regularly to ensure they reflect your current processes and tone of voice.
- Use dynamic fields wherever possible to make emails feel more personalised and professional.
- Keep the tone clear and friendly - clients should easily understand what’s being requested and how to complete it.