
TABLE OF CONTENTS
Overview
Our Actionstep integration is simple to set up and lets you start and manage AML checks directly from an Actionstep matter, with client and matter details flowing automatically into First AML. This means less manual data entry, fewer errors, faster onboarding, and a smoother AML process that fits naturally into your matter workflow.
Video summary: the video walks through connecting First AML to Actionstep as a Compliance Admin, and then shows what a user sees inside an Actionstep matter once it's connected: a "Create First AML Case" action that carries the client and matter details across, and the resulting First AML case linked back to the matter.
Prerequisites
To set up the integration, you will need:
- To be a First AML Compliance Admin.
- Credentials for an Actionstep user with Workflow and Workflow Admin permissions.
For everyday use of the integration, users need a First AML account for creating cases. We call this a Frontline account: it lets a user create and work cases day to day, without the admin permissions needed to configure the integration itself.
Setting up the integration
1. Connect First AML to Actionstep
- As a Compliance Admin, select "Settings" > "Integrations" > "Actionstep" > "Connect".
- You'll be redirected to Actionstep to log in. You must log in as a user with Workflow Admin permissions. We recommend creating a separate Actionstep user for this purpose if you don't already have one.
2. What happens at setup
Once connected, First AML creates two new Data Collections in your Actionstep Matter Types.
A Data Collection is a custom set of fields Actionstep displays on a matter; the two we add are used to create a First AML case, and to keep case history in sync with Actionstep afterwards.
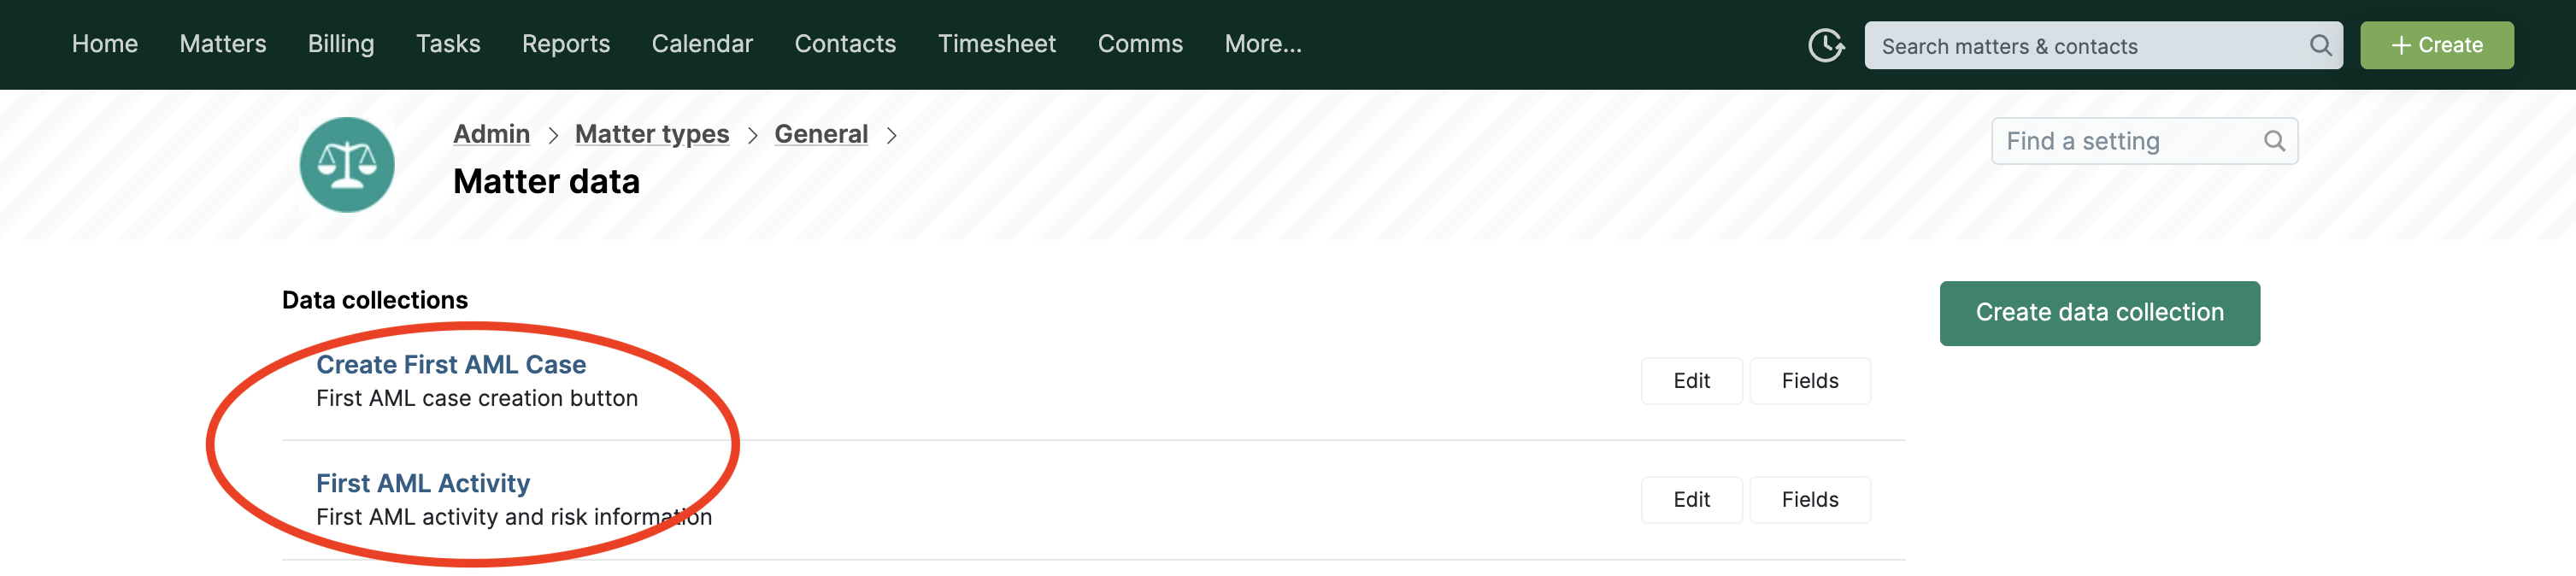
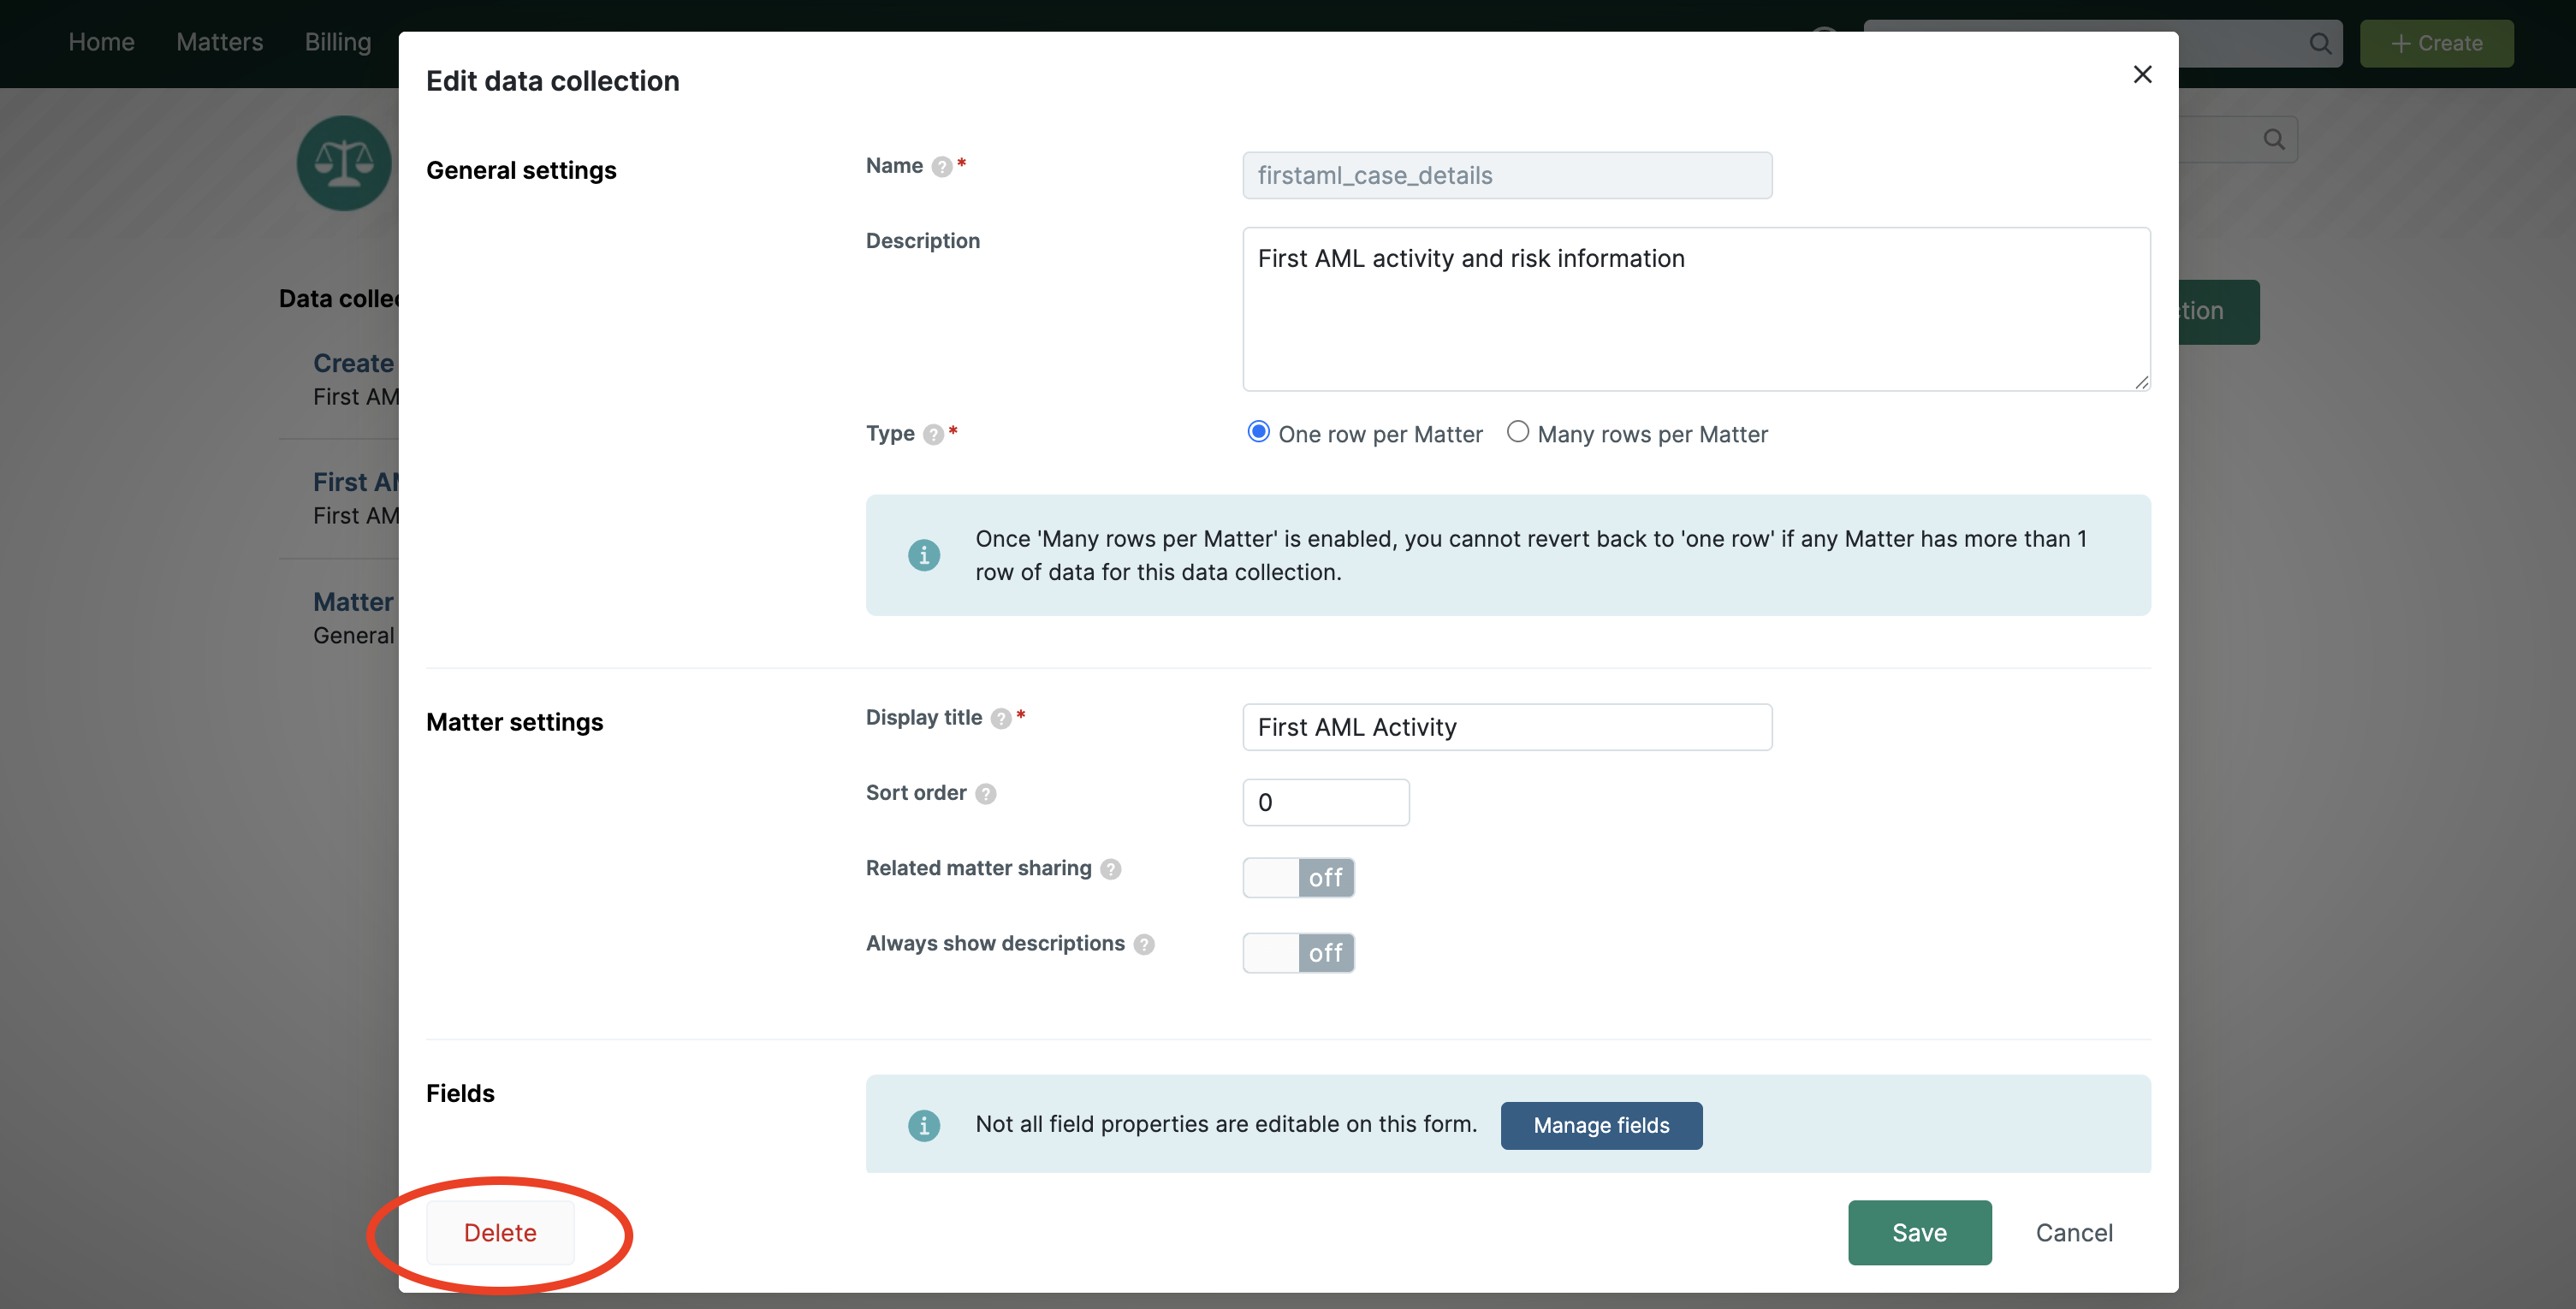
This step is optional: if you don’t want a particular Matter Type to be able to trigger a First AML case, you can remove our custom Data Collections from that Matter Type.
See this Actionstep article for editing Data Collections. You can also set System role permissions on the Data Collections we create, to control who can and can’t access them.
3. Double-check that AML features are enabled in Actionstep
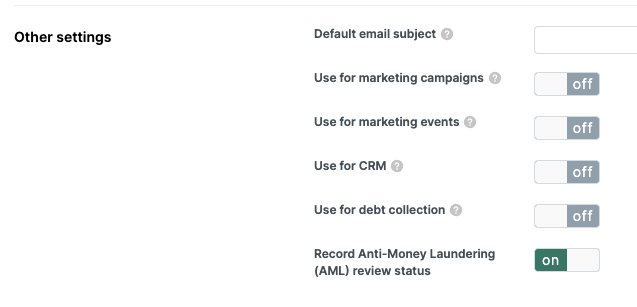
Enable AML for Matter Types:
- In the Actionstep Admin area, select "Matter types".
- For each Matter Type where AML is relevant, select the Matter Type, then select "Matter type settings".
- Under "Other settings", ensure "Record Anti-Money Laundering (AML) review status" is switched ON.
Enable AML for Participant types:
A participant type in Actionstep is a category of contact on a matter, for example Company or Individual. Each type has its own set of information panels that you can turn on, and Anti-Money Laundering needs to be one of them.
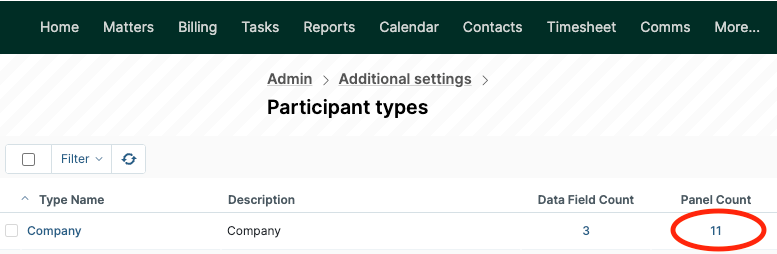
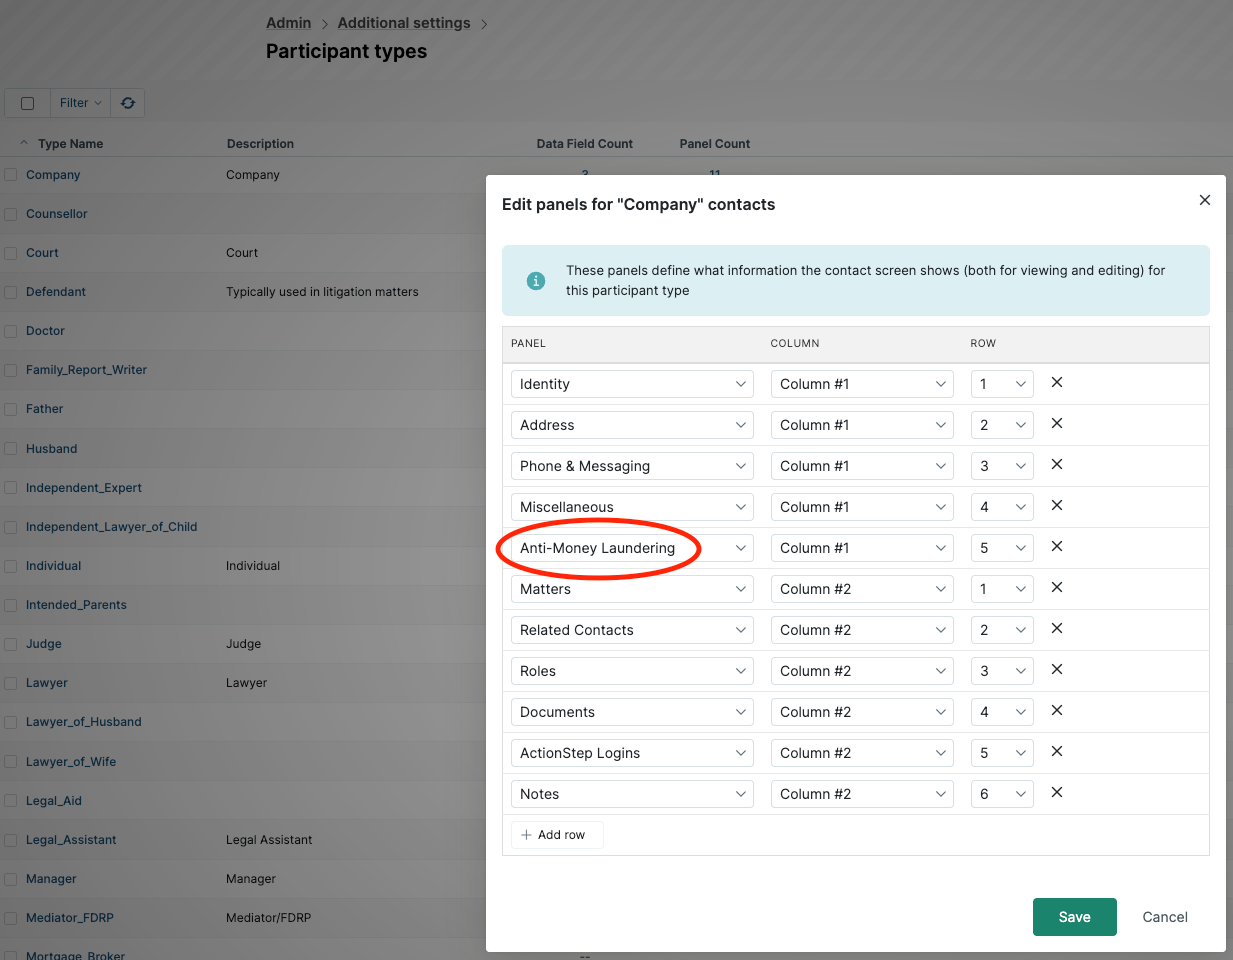
- To enable the AML panel for Company:
- In the Admin area, select Additional settings, then select Participant types.
- Find the Company participant type and select the number in its Panel Count column.
- Check whether Anti-Money Laundering is listed as a panel.
- If it isn't, select + Add row and select Anti-Money Laundering.
- To enable the AML panel for Individual:
- In the Admin area, select Additional settings, then select Participant types.
- Find the Individual participant type and select the number in its Panel Count column.
- Check whether Anti-Money Laundering is listed as a panel.
- If it isn't, select + Add row and select Anti-Money Laundering.
How it works
Creating a case from an Actionstep matter:
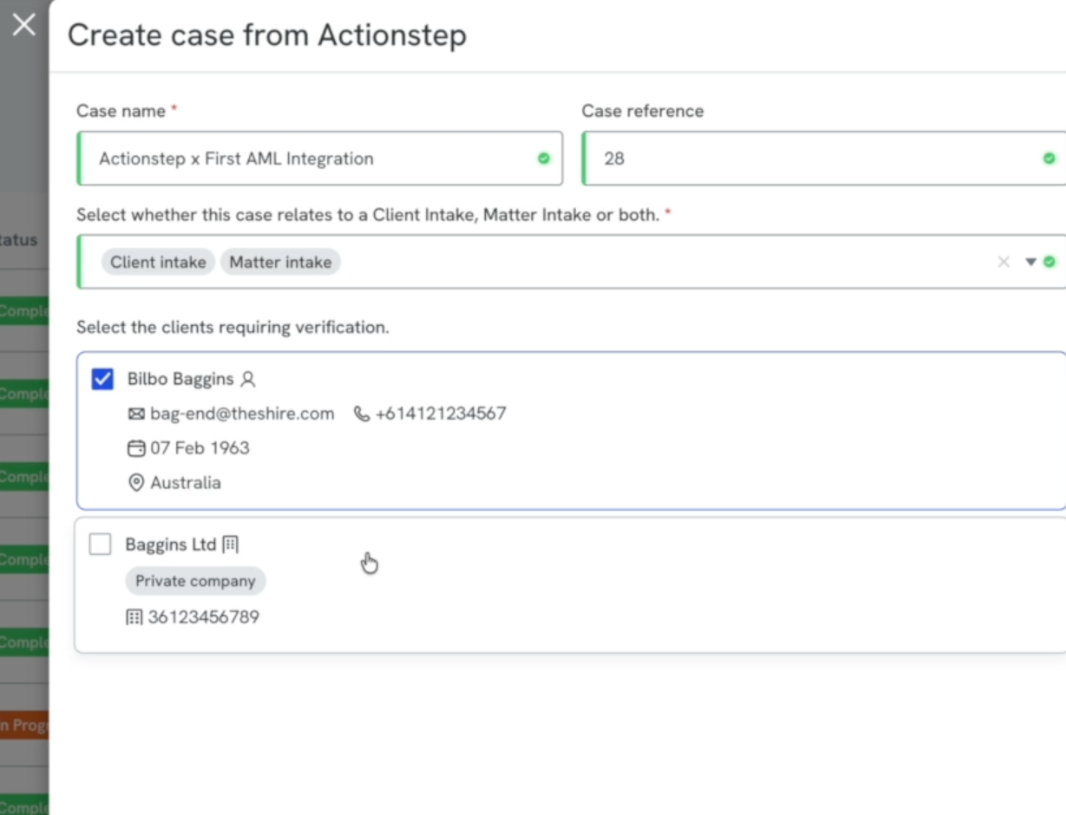
- Select Create First AML Case from within the Actionstep matter.
- Confirm your client and matter information, which is pre-filled.
- Select whether the case relates to a Client Intake, a Matter Intake, or both.
Your selection assigns Client tags and/or Matter tags. Your Compliance Rules use these tags to make sure your team collects the right documents and follows the correct procedure under your AML programme, for example whether a Client and/or Matter risk assessment is completed.
See our article on Customising compliance rules for more on how these rules work.
What happens next:
- Actionstep updates with a link to the First AML case, and sets the Matter and Client AML status to In Progress.
- First AML retains key matter reference information, letting you link back to Actionstep from any case or profile.
- Once the AML case is completed, Actionstep's Matter and Client AML statuses update with the verification results, and a case summary PDF is uploaded to the Matter's documents folder.
- If First AML recognises a returning contact from Actionstep, it retrieves them into the case automatically. You can confirm their last verification result and link straight through to the previous case, without any manual lookup.
Enabling automatic disbursement records
The Actionstep disbursement record feature allows First AML to automatically create a disbursement record against the associated matter in Actionstep, using the units a case has consumed and the disbursement settings you have configured. This removes the need to manually re-key AML costs into Actionstep by hand.
The Actionstep disbursement record feature becomes available once both Disbursements and the Actionstep integration are enabled.
You will find it in First AML under Settings > Integrations > Actionstep > Disbursements.
Before you start
This feature is available to Compliance Admins. To use it you need:
- The Actionstep integration connected and enabled.
- The Disbursements feature enabled.
Turn on Actionstep disbursements
- Go to Settings > Integrations > Actionstep and open the Disbursements tab.
- Switch the Actionstep disbursement records toggle to on.
- Configure how the disbursement records should be created within Actionstep (see below).
- Select Save.
Note: If you have the Actionstep integration enabled but the Disbursements feature is not yet enabled, the Disbursements tab shows a banner prompting you to enable Disbursements. Firstly enable Disbursements, then return to this tab.
You can switch the toggle off at any time to stop new disbursement records being created in Actionstep.
Configure your disbursement records
The Disbursements tab gives you control over how each record is written into Actionstep:
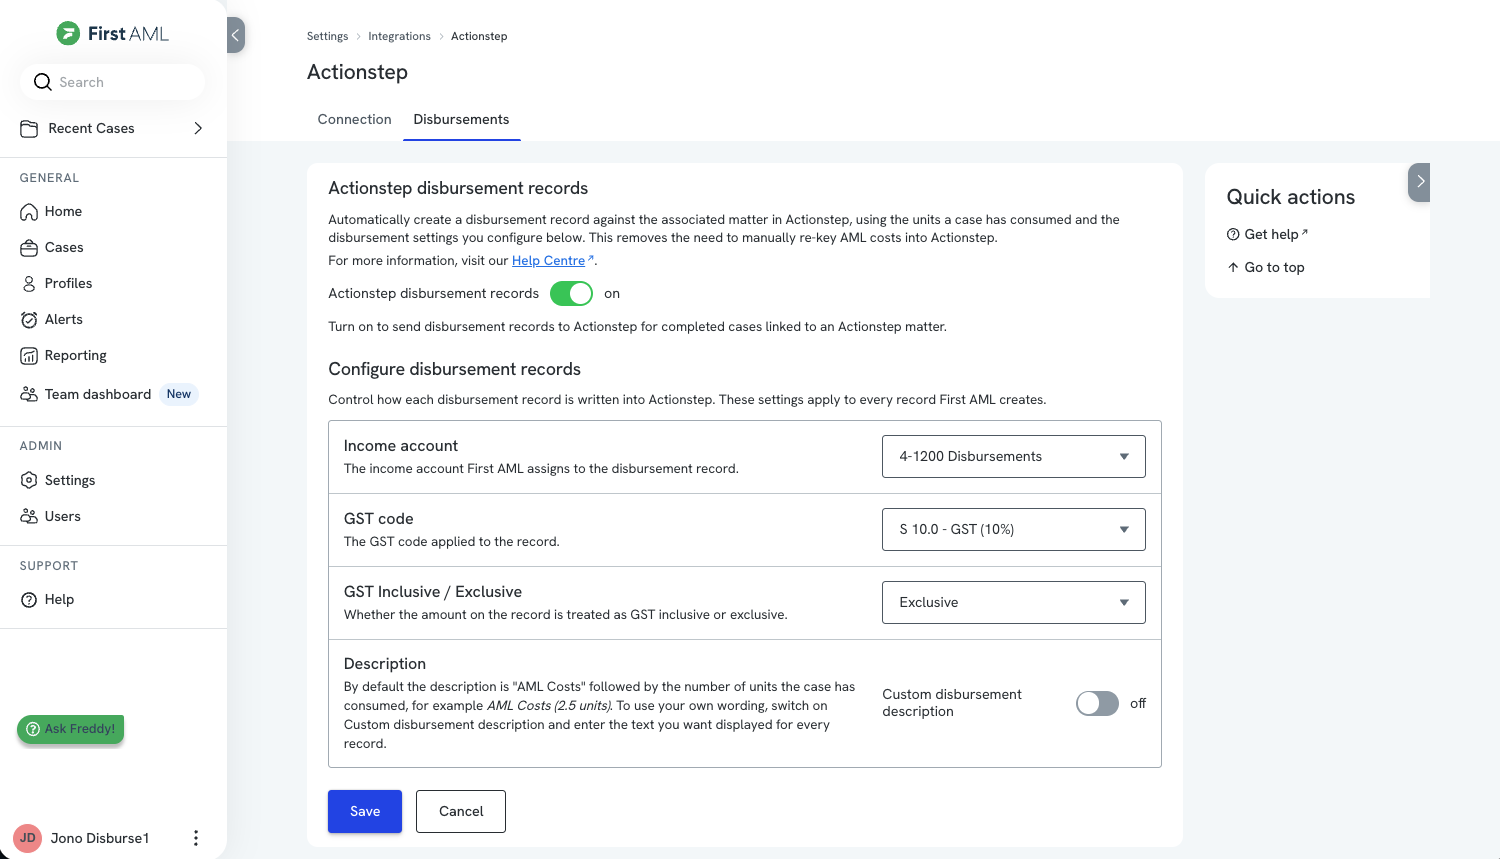
- Income account: The income account First AML will assign to the disbursement record.
- GST code: The GST code applied to the record.
- GST inclusive / exclusive: Whether the amount on the record is treated as GST inclusive or exclusive.
- Description: By default the description is “AML Costs” followed by the number of units the case has consumed, for example “AML Costs (2.5 units)”.
To use your own wording instead, switch on Custom disbursement description and enter the text you want displayed for every disbursement record created.
These settings apply to every disbursement record First AML creates in Actionstep, so they only need to be set once. You can update them whenever your accounting setup changes, and the new settings apply to records created from that point on.
You also have the ability to manually edit these records directly within Actionstep before they are invoiced.
For a breakdown of how a case’s units convert into the disbursement amount, see Understanding the disbursement report.
When disbursement records are created
An Actionstep disbursement record is created for a case when all of the following are true:
- The Actionstep disbursement record feature is enabled.
- The case is linked to an Actionstep matter (the case was created from a matter in Actionstep using the Actionstep integration).
- The case is completed.
- Disbursements have been calculated. It may take up to 90 minutes after checks are run to calculate disbursements. This is often already done when your case is completed, but if checks were run immediately before the case was completed, it may take up to 90 minutes after case completion to see your disbursement record created within Actionstep.
Viewing recorded disbursements in Actionstep
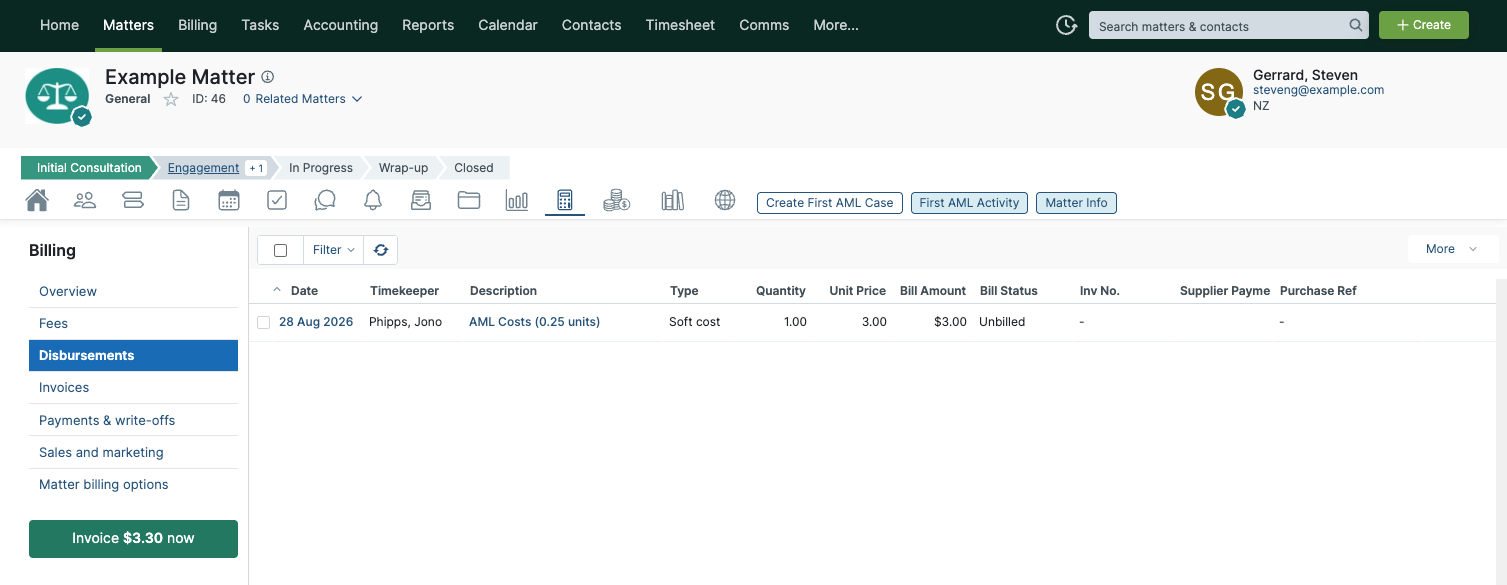
Once created, your disbursement records will be visible from the Billing menu within the associated Matter. See Actionstep’s help article for more information.
Your disbursement record will contain the total disbursement amount for the case. For more on how that amount is made up, see Understanding the disbursement report.
If the case is reworked and additional checks are run, when the case is once again completed, we will create a new disbursement record containing the additional units consumed within that rework activity.
Any other cases you create from this same matter will also create a new disbursement record when these cases are completed.