
TABLE OF CONTENTS
Send out an Electronic Identity Verification (EIV) request via email or SMS
Click on the individual or entity then click the relevant requirement
Document Expiry Alerts in the Manifest
Summary
The Manifest tab provides a centralised view of case progress. It shows what’s required, what actions to take, and the status of those actions, making it easy to manage your case from one place.
You can use it to:
View suggested requirements based on compliance rules.
Add, assign, and complete requirements.
Collect and verify client information.
Track overall case progress and alerts.
Understand and manage requirements
Requirements are tasks such as uploading a document or verifying identity. They can apply at the case, individual, or entity level.
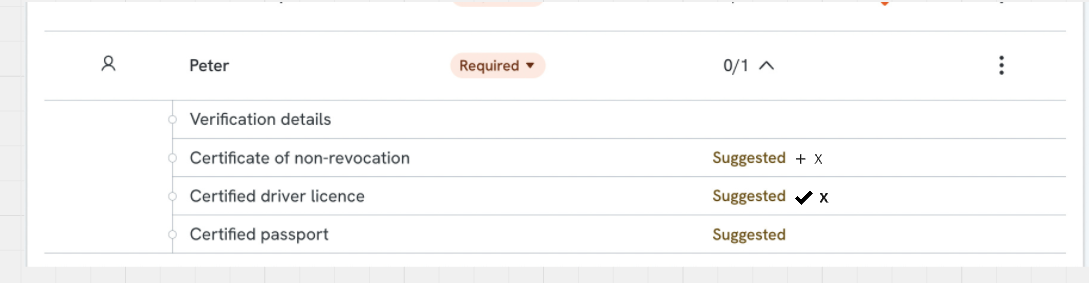
The Manifest tab suggests requirements automatically based on pre-set compliance rules
which you can accept or dismiss by clicking the checkmark icon.
Add requirements
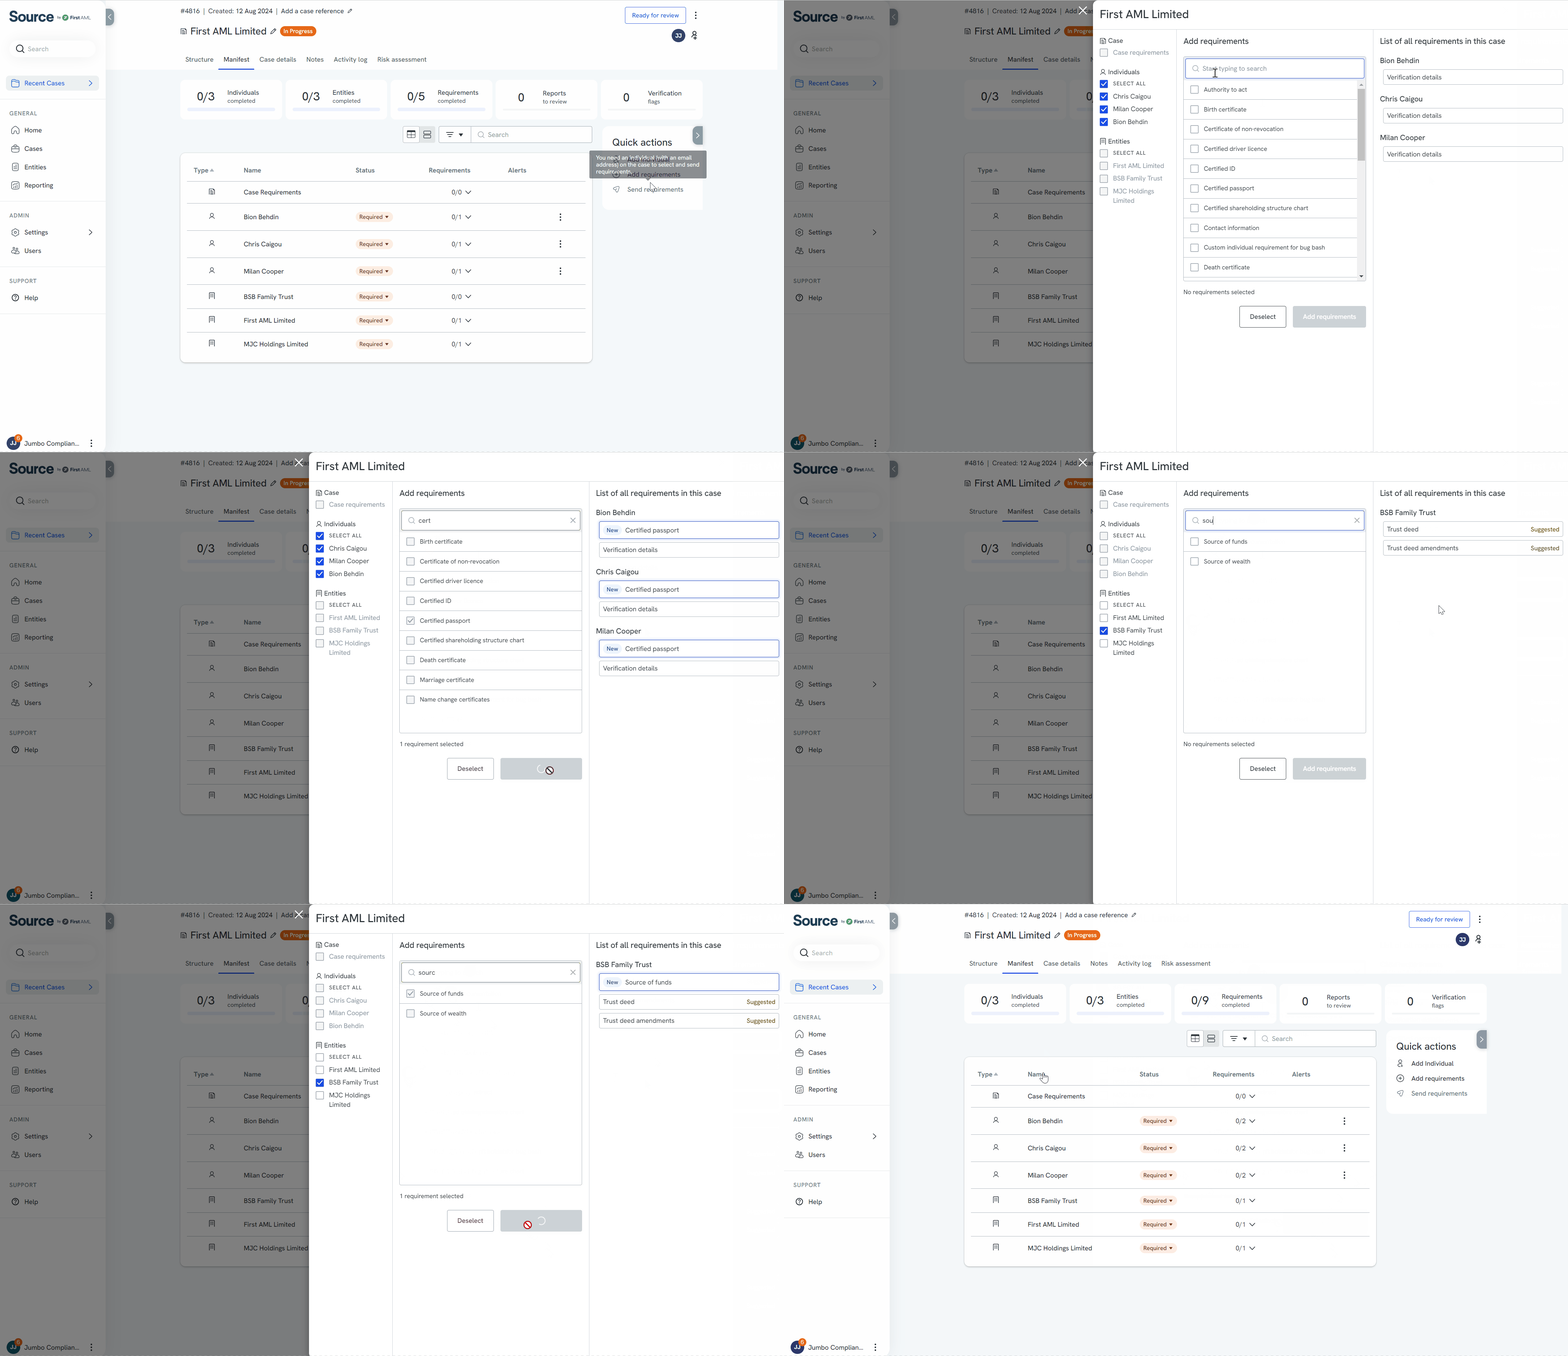
- Go to Quick actions > Add requirements.
- Use the dropdown to search/select one or more items. Use Select All to add the same requirements to multiple individuals or entities.
- Click ‘Add requirements’
- Note: A requirement can only be assigned to one level (case, individual, or entity) at a time.
- Note: A requirement can only be assigned to one level (case, individual, or entity) at a time.
Upload documentation
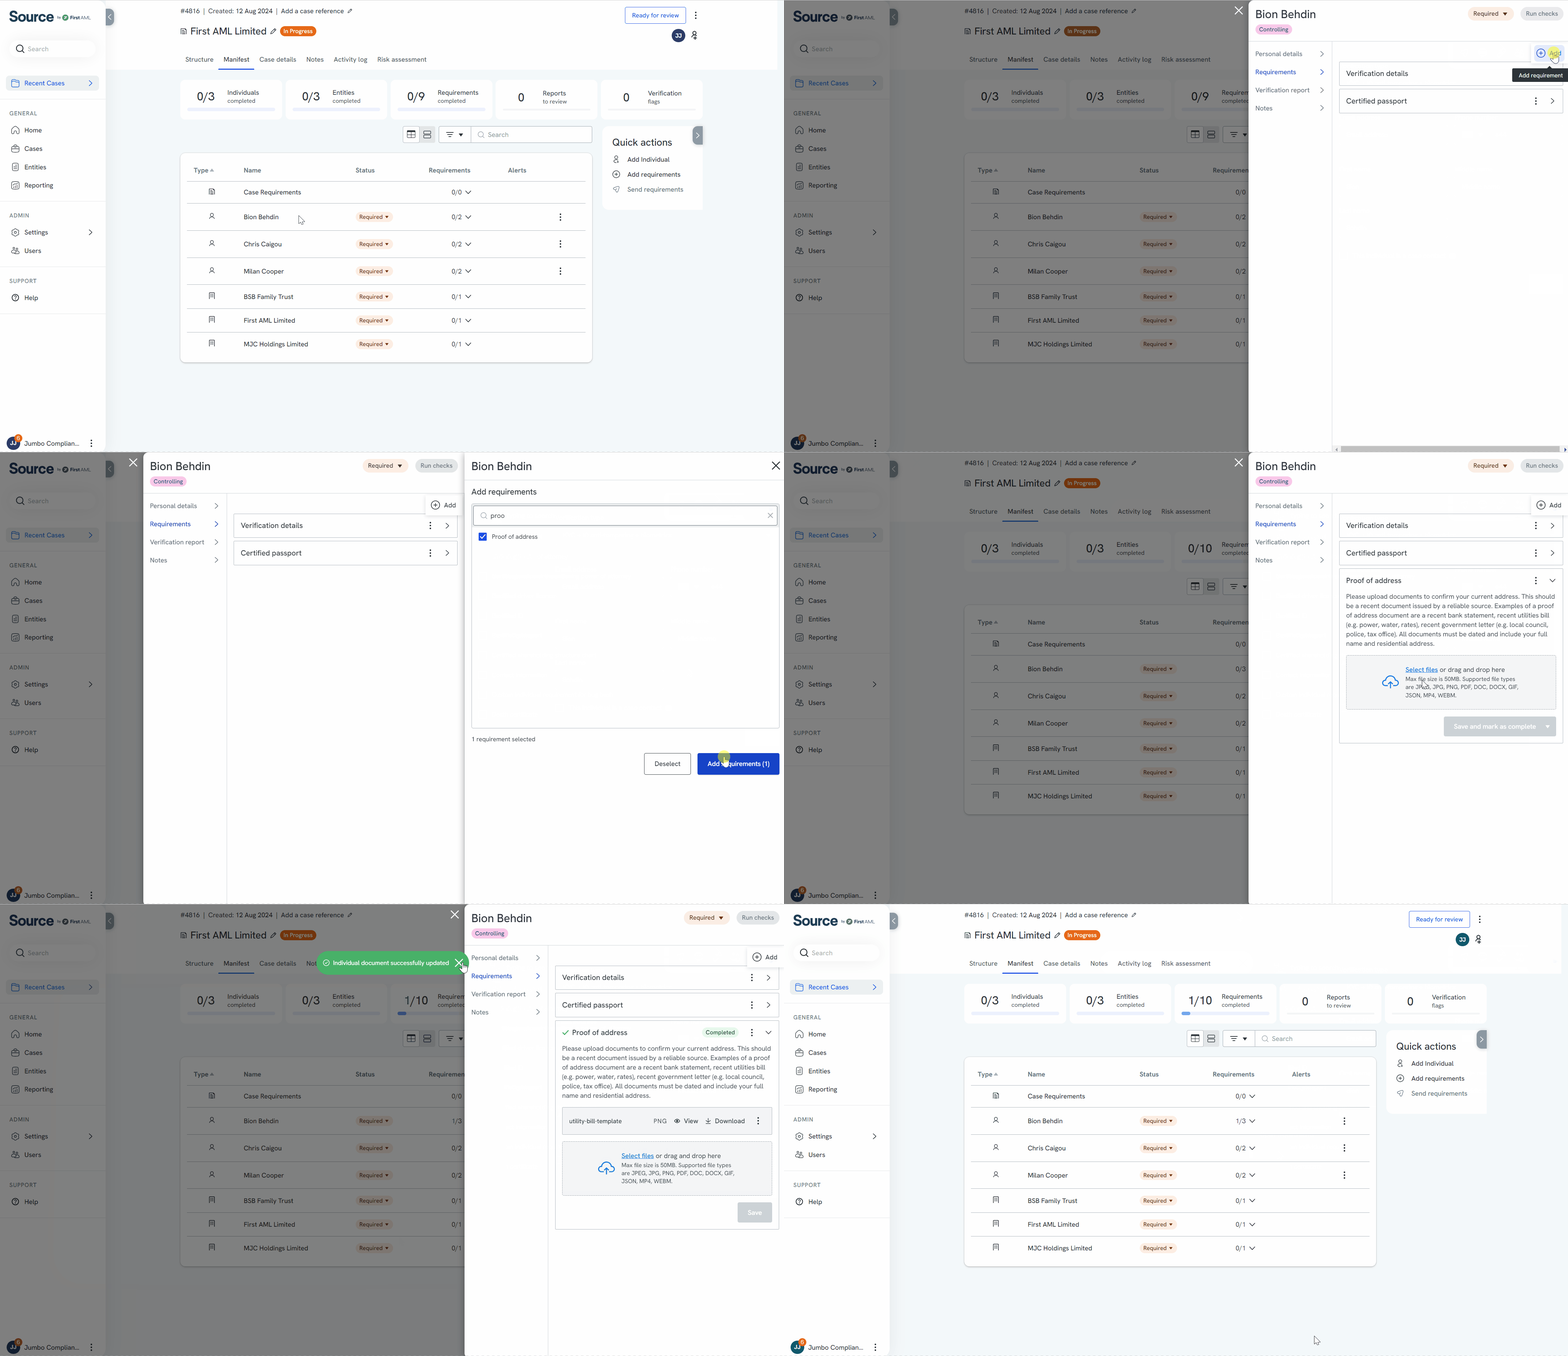
- Click the relevant individual or entity
- In the slide-out, go to Requirements > Add.
- Select a requirement and click Add.
- Click the requirement > Select filesor drag and drop.
- Optional: rename the document by selecting the text of the file name and editing the field
- Click ‘Save and mark as complete’
To reset the status of the requirement, click the three dots to the right of the requirement and select 'Reset status’.
Collect information from clients
- Navigate to ‘Quick actions’ and click ‘Send requirements’.
- Select the requirements you want to request by clicking them individually or select all by clicking 'select all'.
- Click ‘Send requirements’
- Select the recipient to by using the ‘To’ field.
- Click ‘Send’.
Requirements can also be sent automatically. See Automatically sending secure web forms.

Send secure web form checklist
If your organisation uses the Send secure web form automation, the form goes to your client without anyone pressing send. The Manifest shows a checklist of the conditions the automation is waiting on, so you can see why a form has not gone out.
To check why a form has not been sent:
- Open the case and go to the **Manifest** tab.
- Find the **Send secure web form** checklist.
- Hover over the question mark beside an unmet condition to see how to resolve it. Conditions that need no explanation have no question mark.
The checklist shows one of three things:
- A red cross against one or more conditions. Something is stopping the send.
- A green tick against every condition. The form will be sent.
- A confirmation in place of the checklist. The form has been sent to every recipient.
Note: The checklist only appears on cases that an active Send secure web form rule applies to. If your organisation does not use this automation, you will not see it. To set the automation up, see Automatically sending secure web forms.
Send out an Electronic Identity Verification (EIV) request via email or SMS
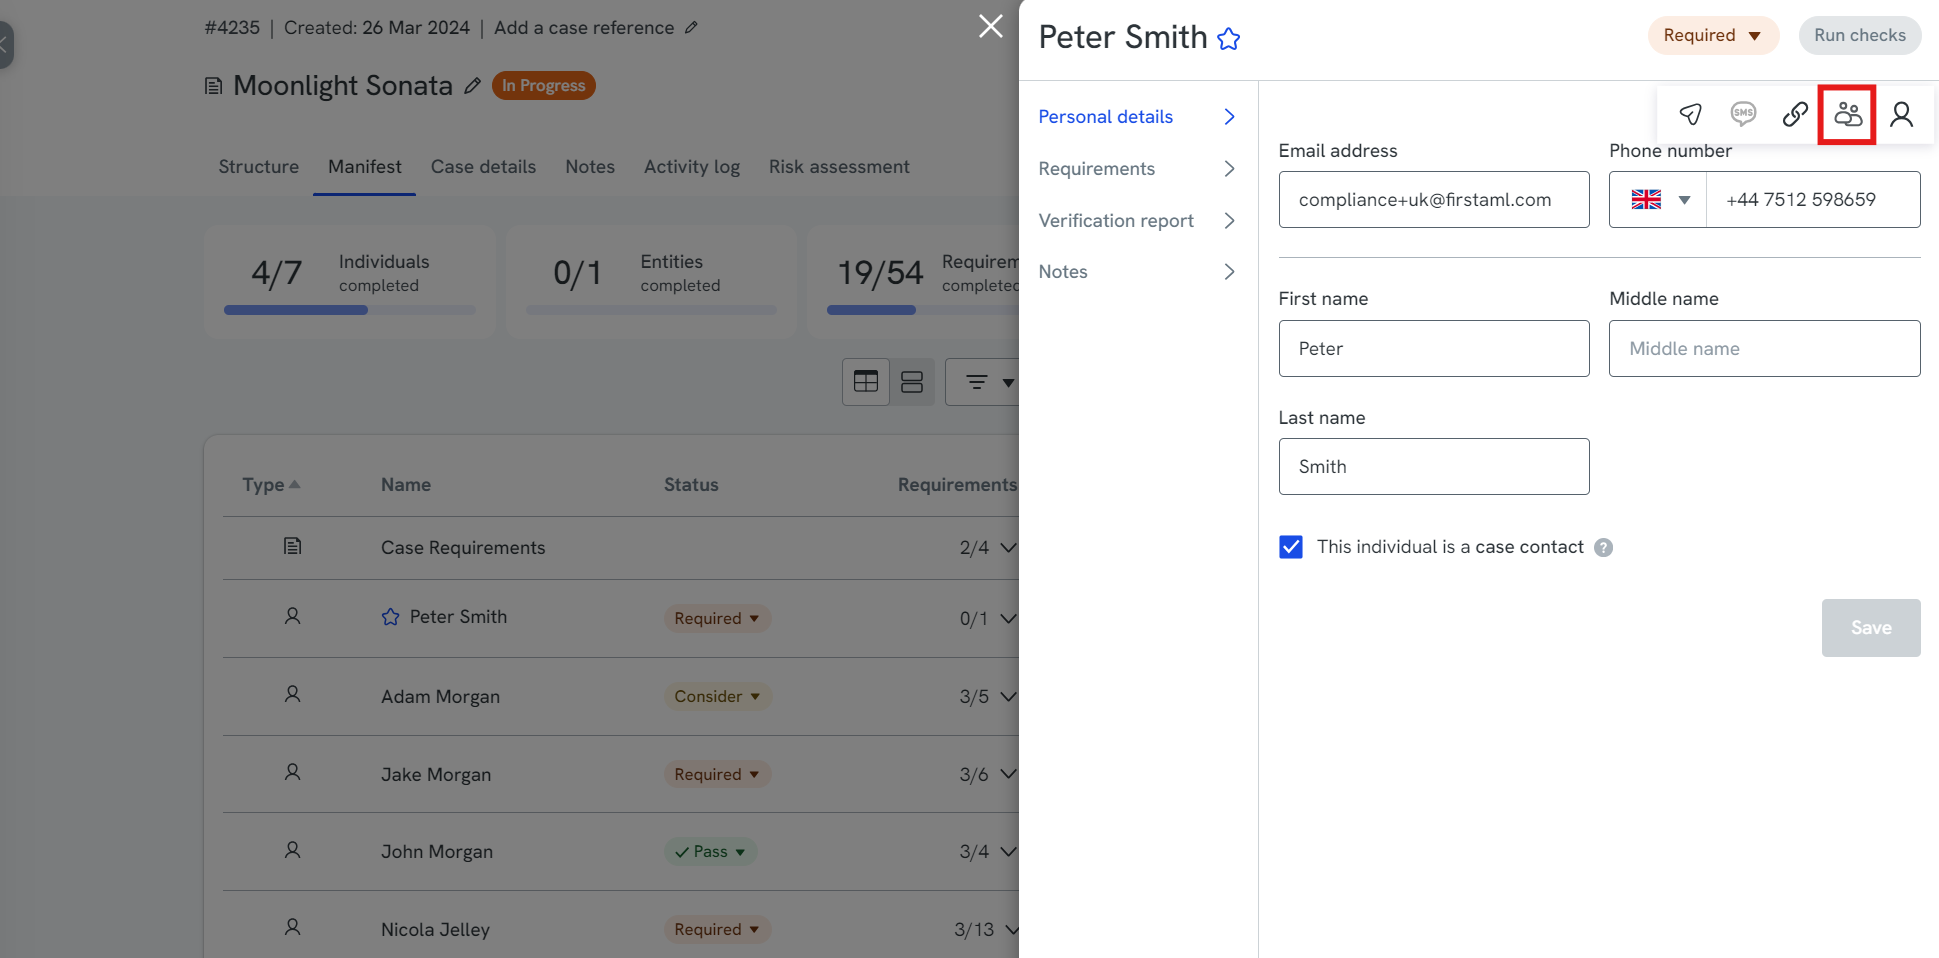
- Click on the individual.
- Ensure the person you want to collect information from is added to the case as an individual and that you have added their email address and/or mobile number.
- Click ‘Send EIV email’ or ‘Send EIV SMS’
- Click ‘Send’

Copy the EIV form link
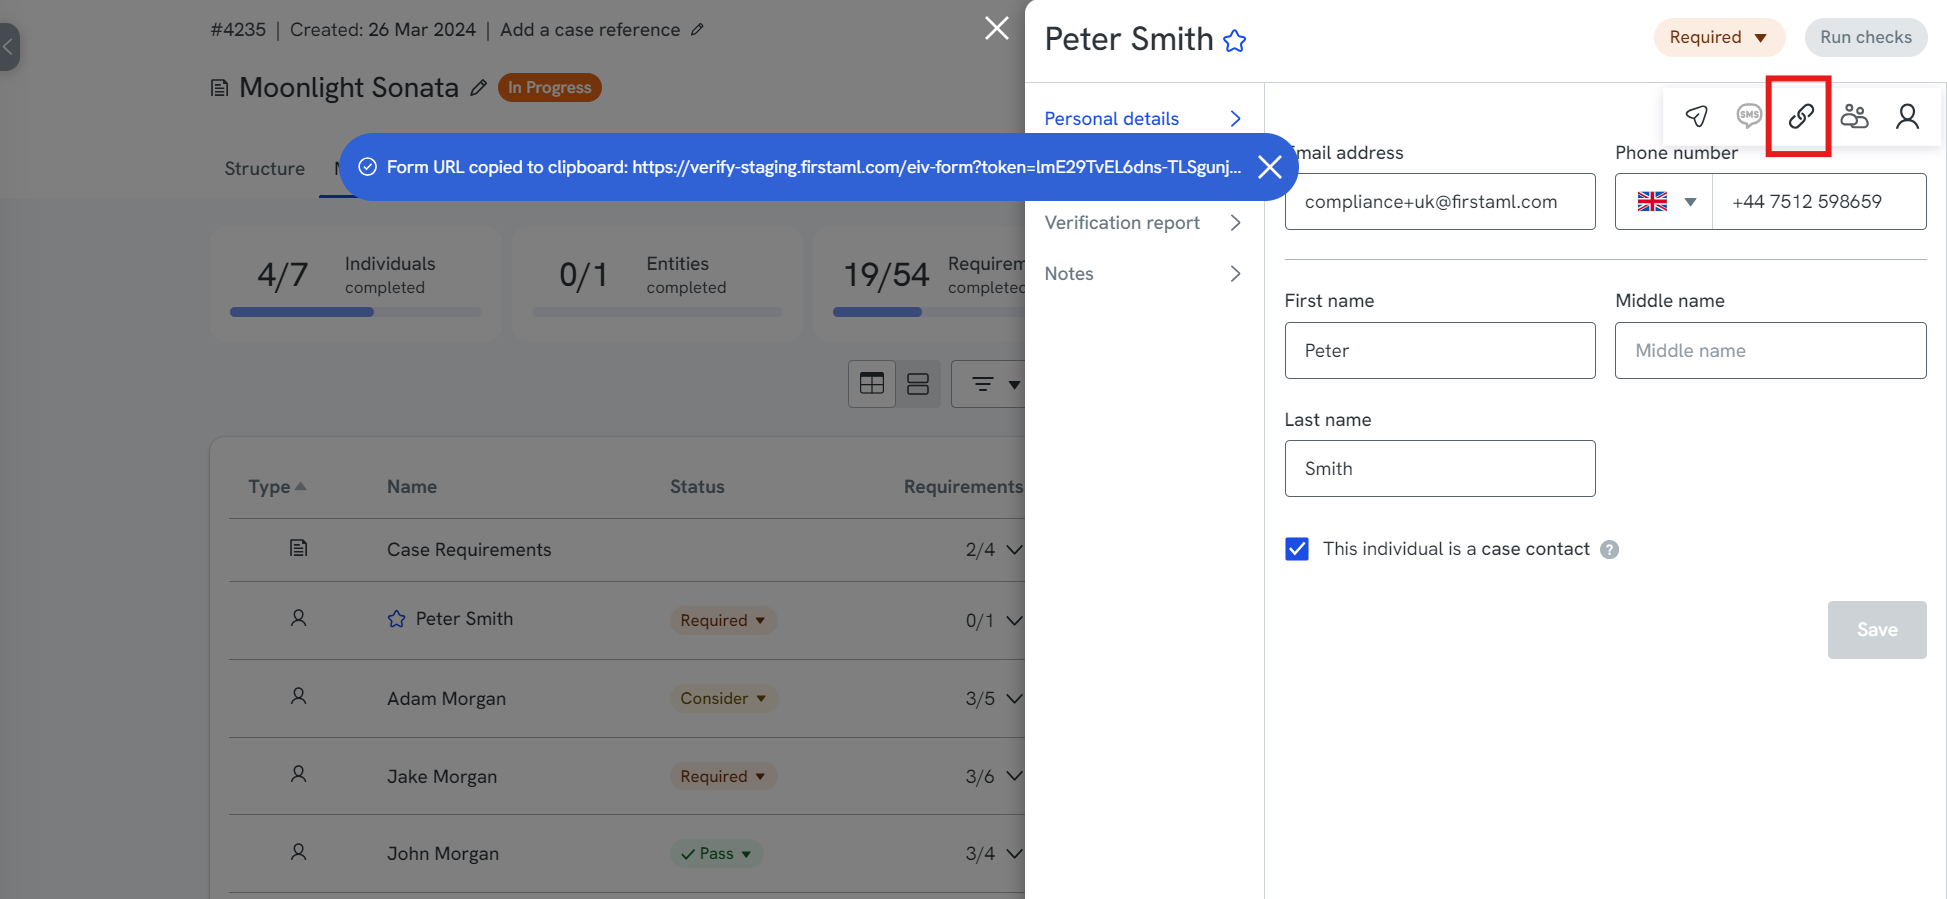
- Click on the individual, then ‘Copy EIV link’.
Verify in-person
- Click on the individual, then ‘Verify now’. Follow our step-by-step guide here
Review documents
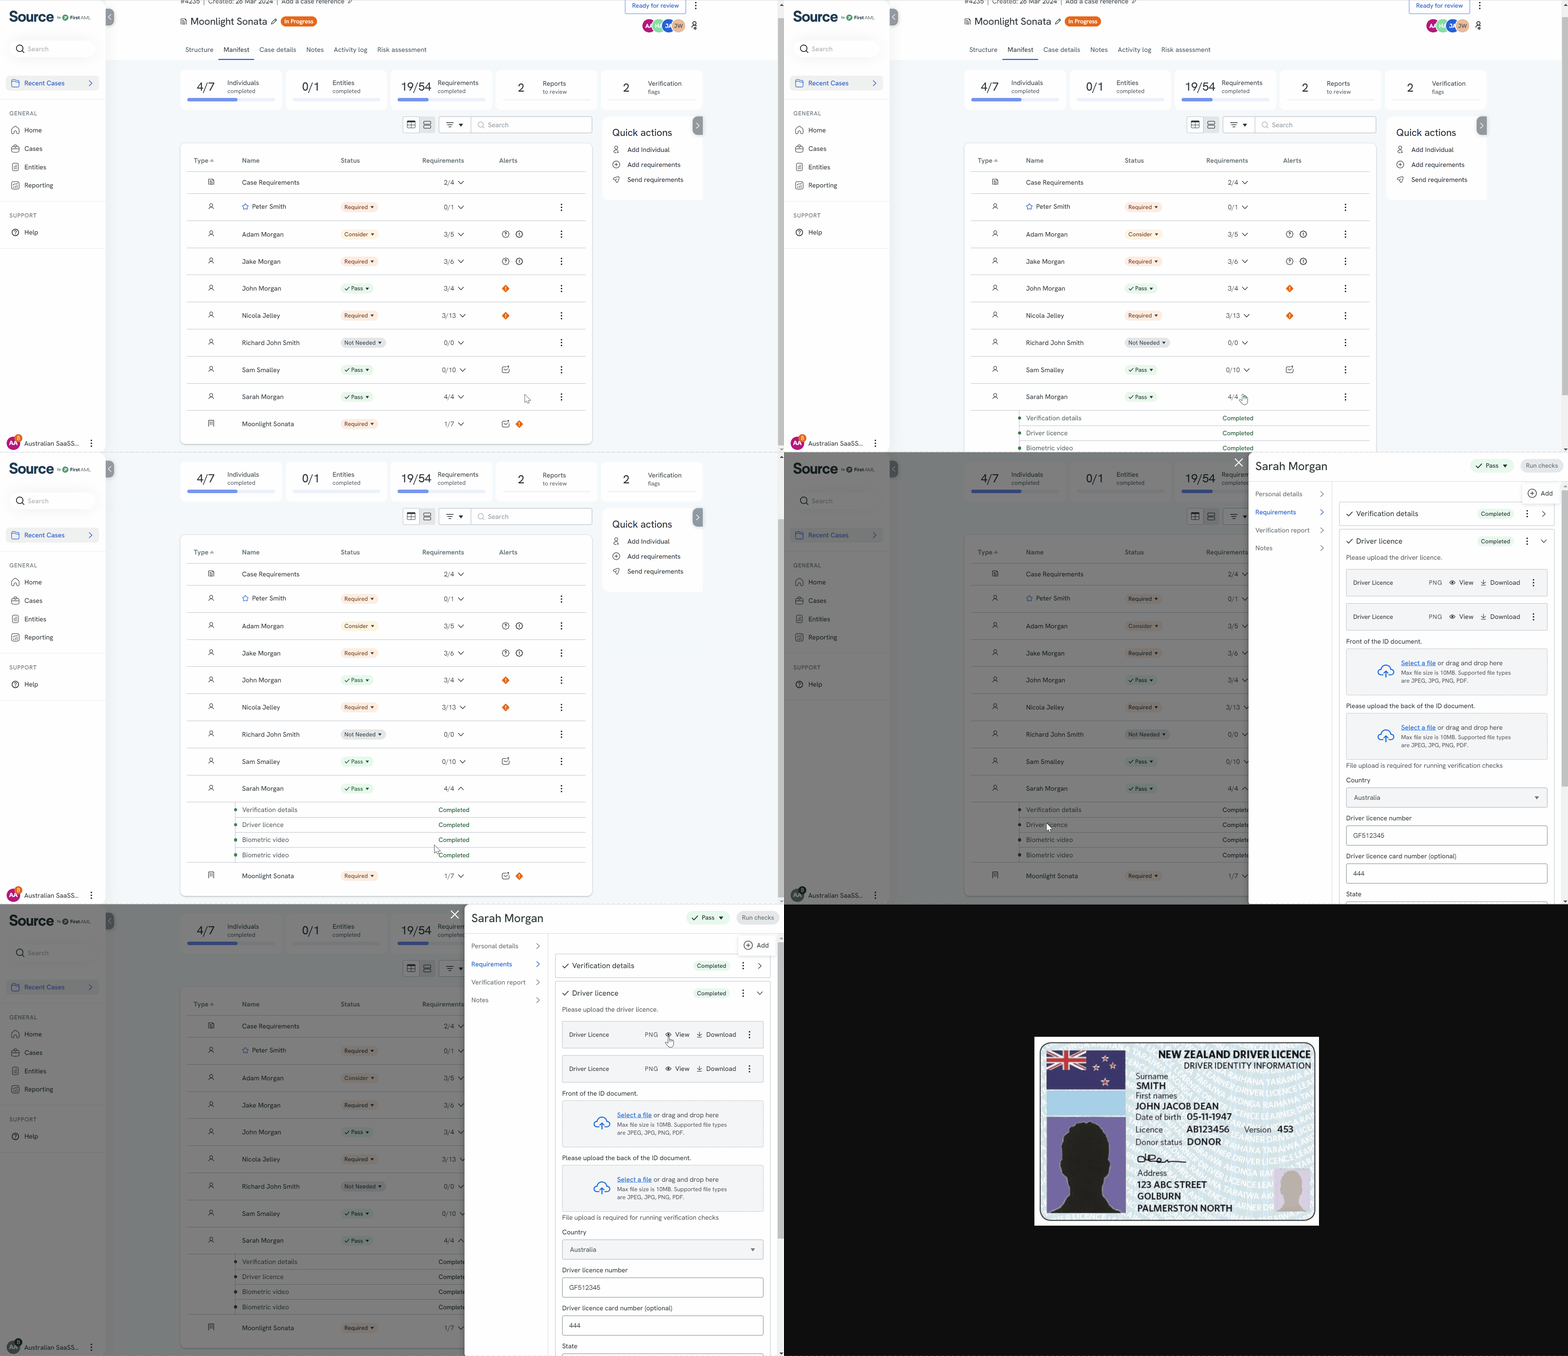
When documents have been processed, a Review required badge shows against any entity or individual that needs attention. Expand the table to see each requirement and its current state, including any that need an attention. For a full guide to statuses and alerts, see Understanding statuses and alerts on a case.
Click on the individual or entity then click the relevant requirement
- Click ‘View’. The document will open in a new tab for review
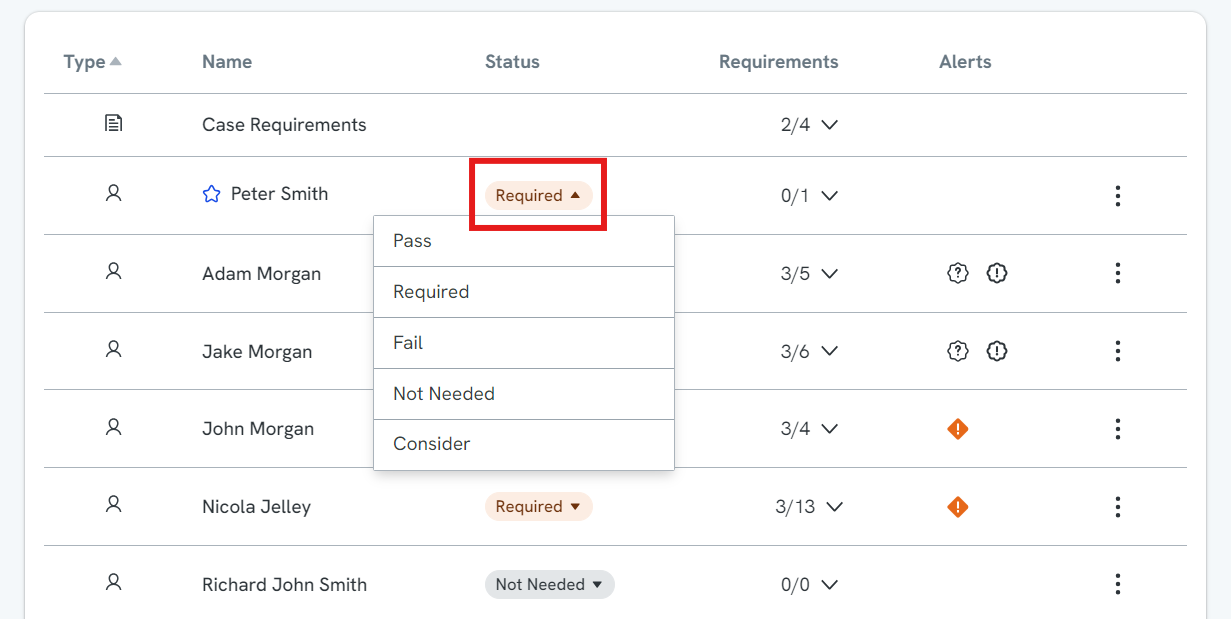
Update an entity or individual status
Change the status of the entity or individual to Pass, Fail, Not Needed, or Consider by clicking ‘Required’
Select, Filter & Search Requirements
Filter
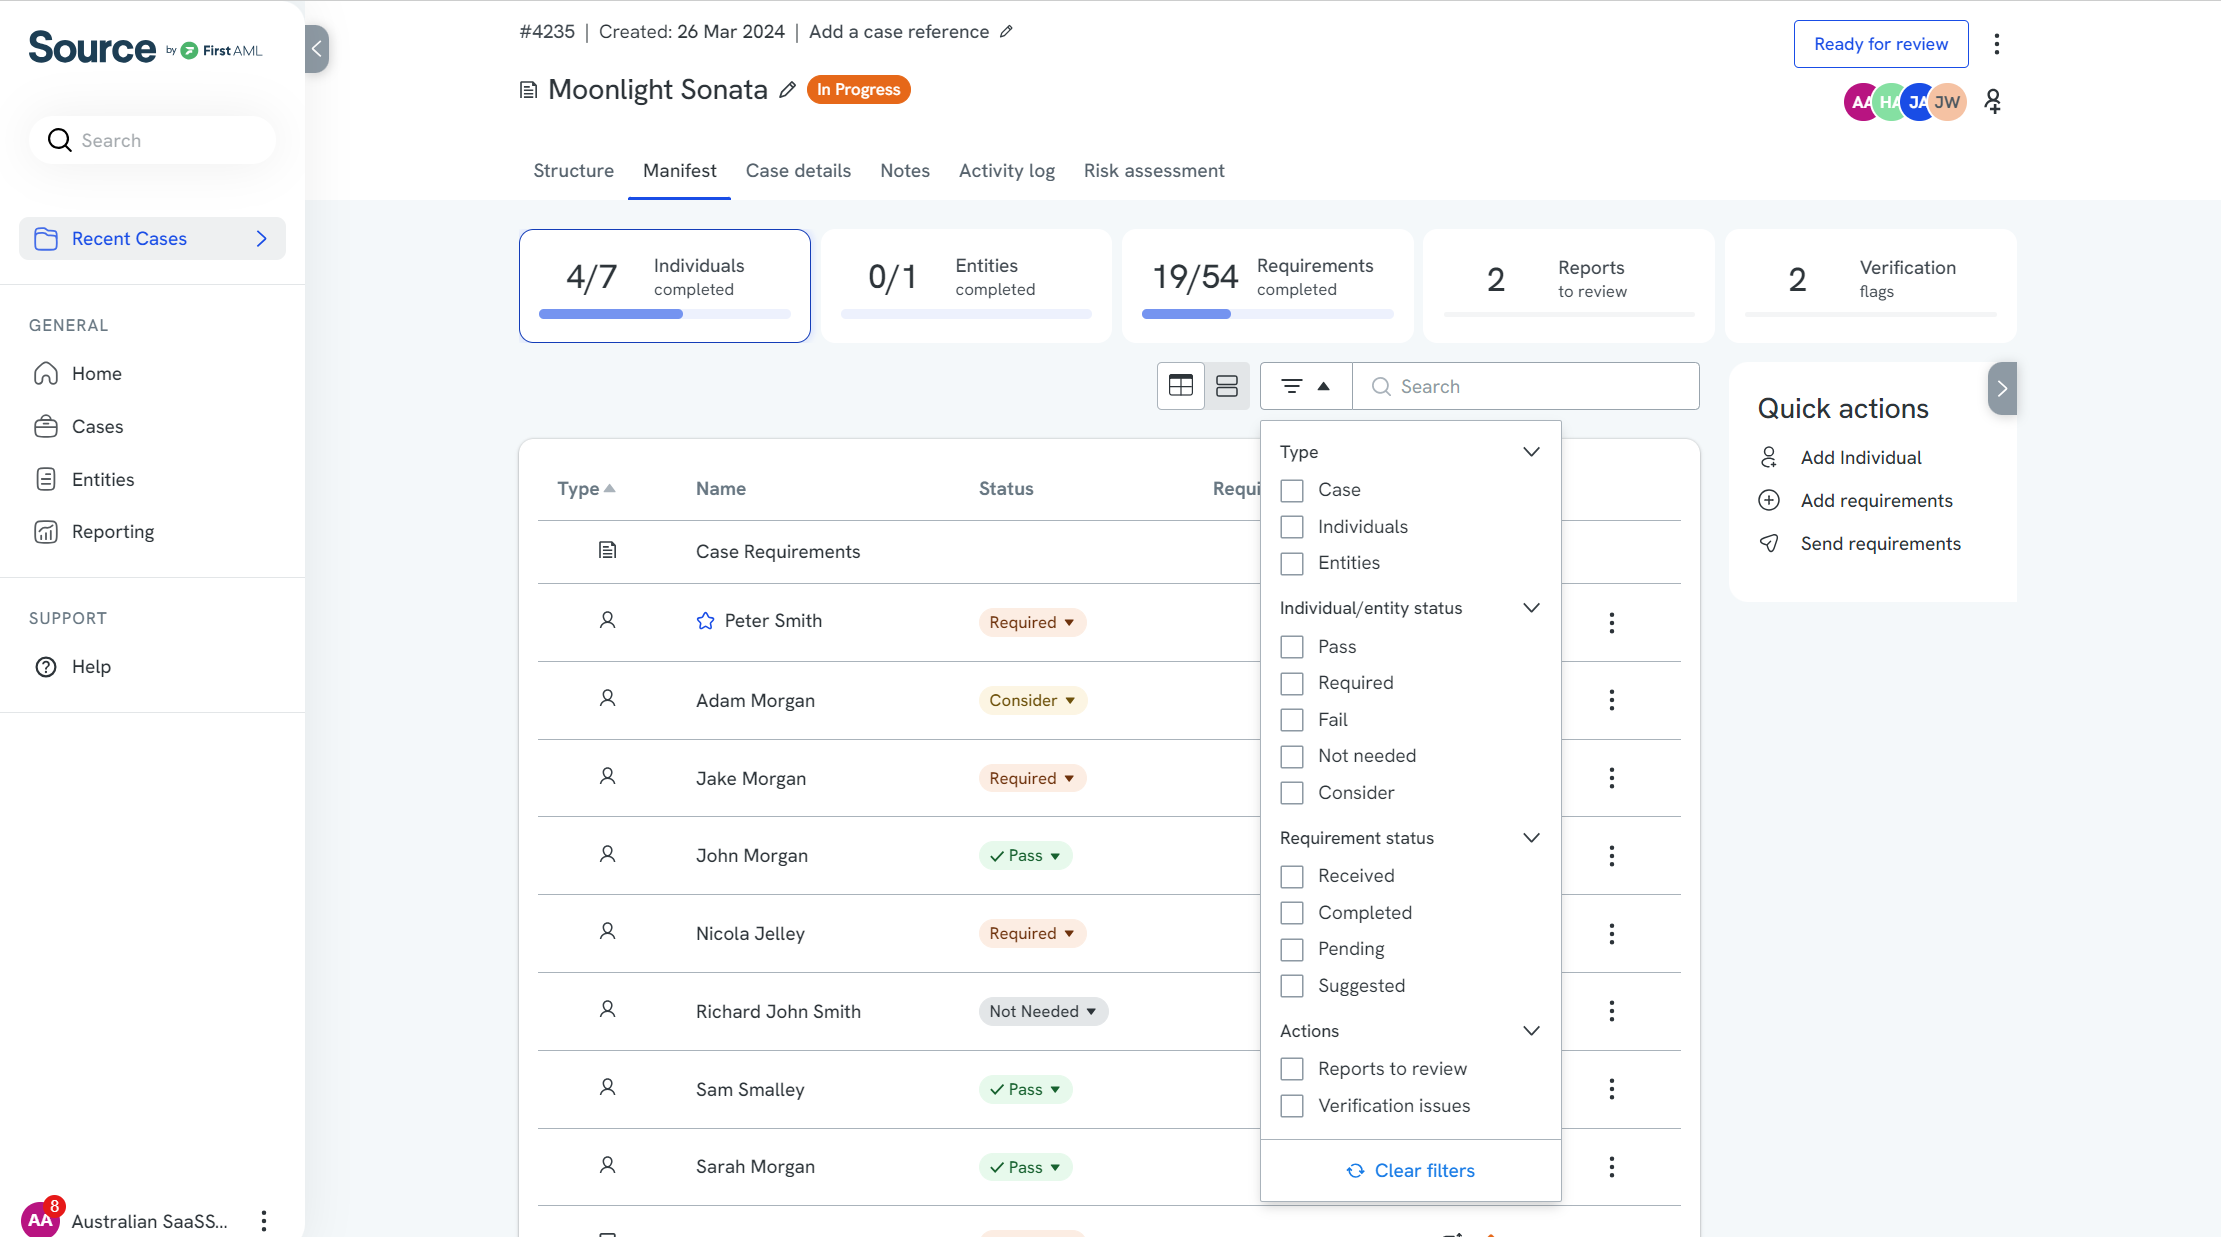
You can filter the Manifest by the type and status of the requirement or the individual/entity. You can select one or multiple conditions within the filter.
To do so, click the filter icon next to the case search bar.
To un-filter the Manifest, click on the filter icon and select 'Clear filters'.
Click the filter icon to filter by:
Type: Case / Individual / Entity
Status: Pass, Fail, Required, Not Needed, Consider
- Requirement status: Suggested, Received, Pending, Completed, Alert
In addition to the existing filters, you can also filter the Manifest by:
- UBOs
- PSCs
- Individuals
- Entities that meet your threshold
- Entities requiring further action
These filters help you quickly isolate key parties on complex cases, without scrolling through the full list.
Example: filtering a case by UBOs and Directors narrows the full Manifest down to only the matching rows. For example:
| Name | Status | Requirements |
|---|---|---|
| Alastair Murray (UBO 79.51%, PSC (ceased), Director) | Required | 0/1 |
| Haydn Jonathan Mursell (Director) | Required | 0/1 |
| Michael Heal (Director) | Required | 0/1 |
| Rendesco Group Limited (PSC) | Not needed | 0/0 |
| Rendesco Growth Shares Nomineeco Limited | Required | 2/4 |
| Rendesco Limited | Pass | 3/5 |
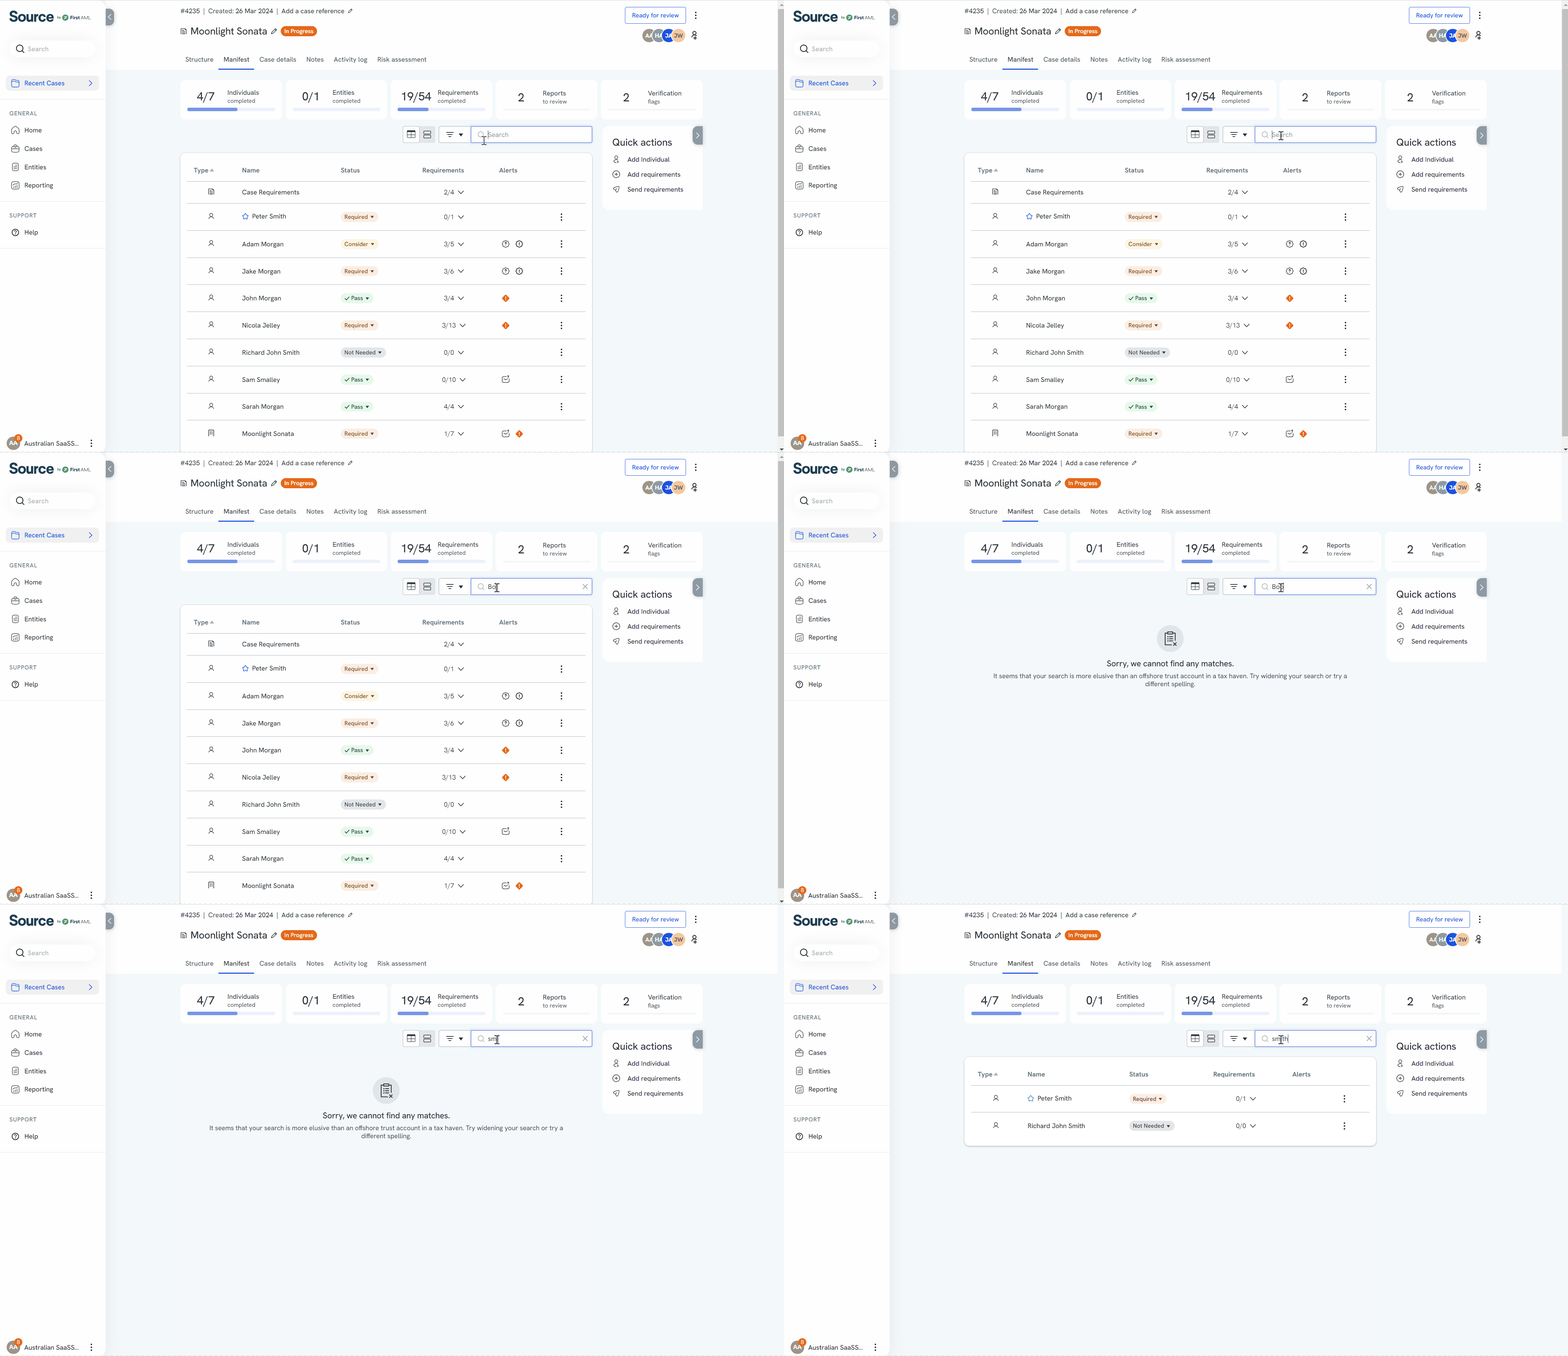
Search
Use the search bar to find a requirement, individual, or entity.
Track progress
The Case data banner at the top of the Manifest shows:
Completed individuals
Completed entities
Completed requirements
Reports to review
Verification issues
Click a tile to filter the Manifest. Click again or Clear filters to reset.

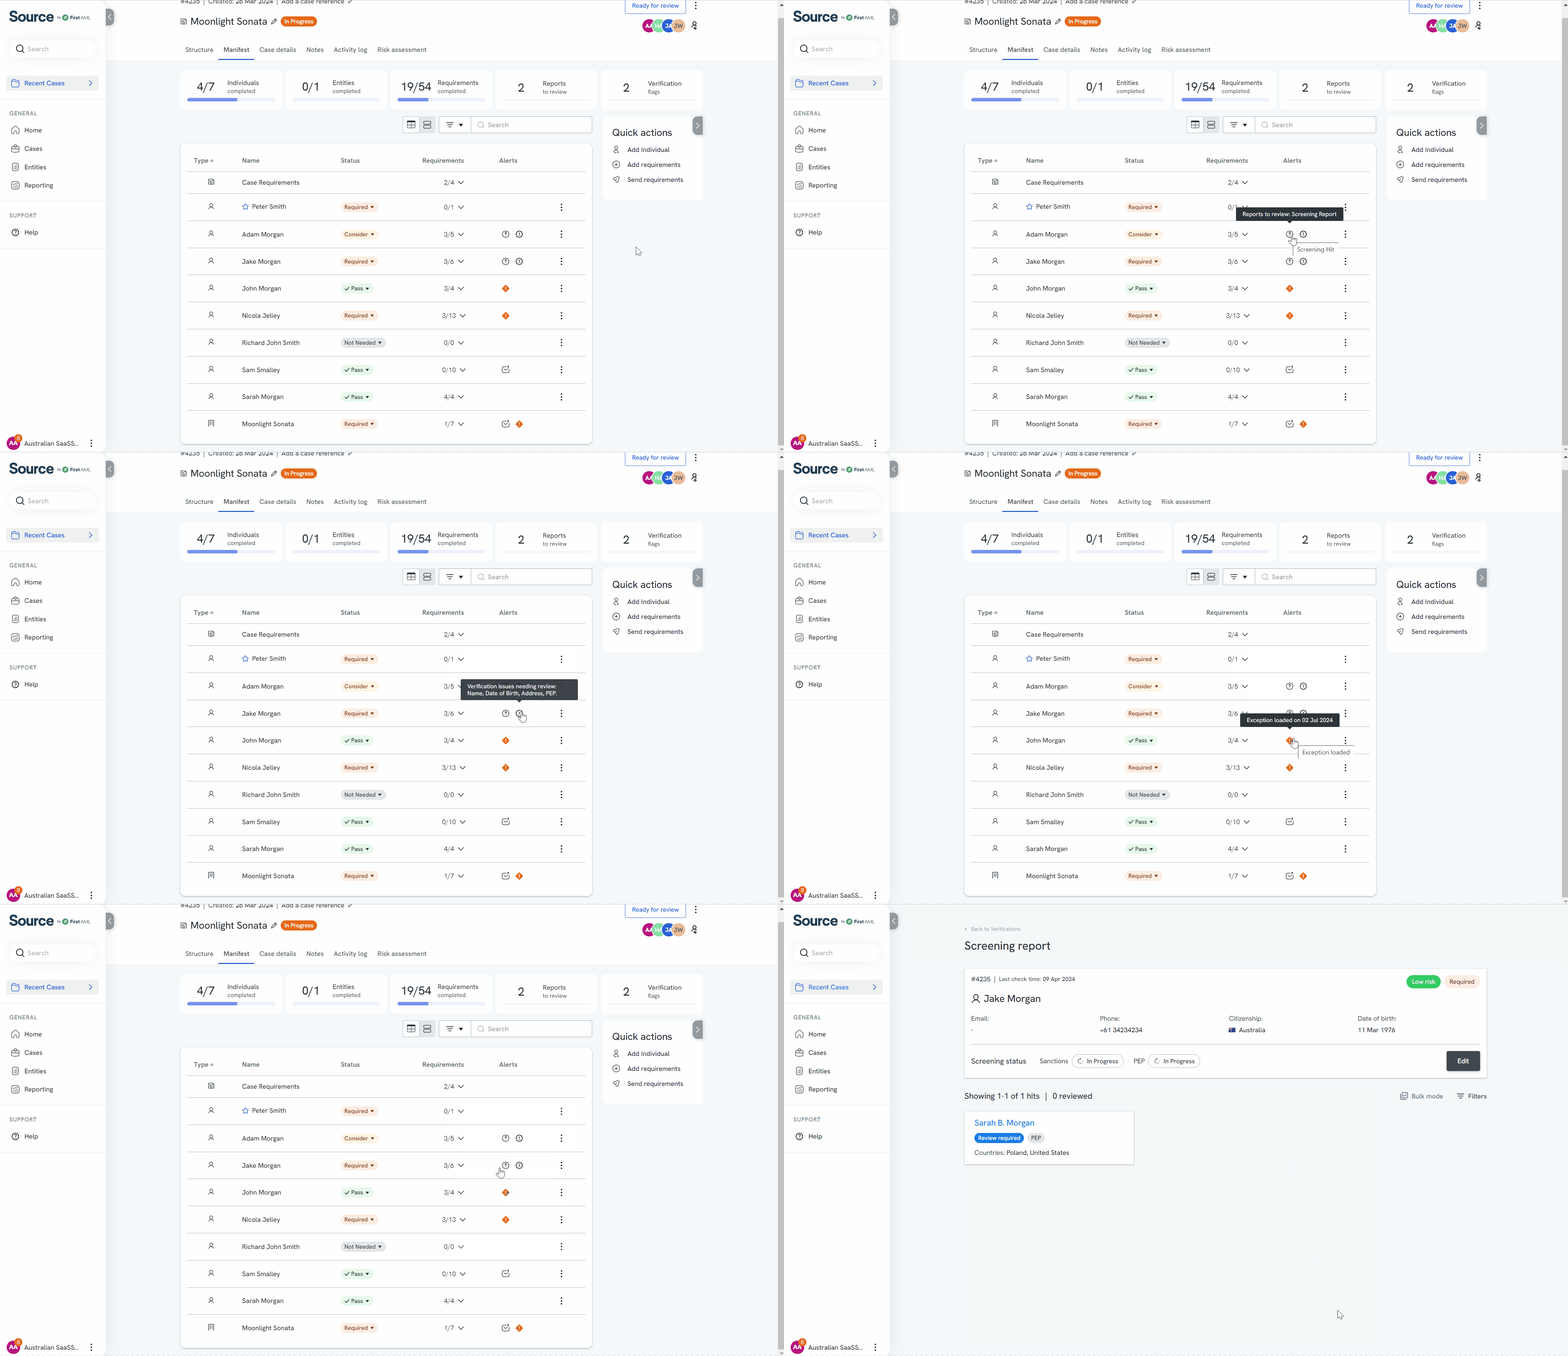
Case Alerts
The Alerts column shows a Review required badge against any entity or individual that needs attention.
The specific alerts appear on the requirement rows underneath, as a short summary in red. For example "Sanction hits +2 more" on a screening report or "No name matches +5 more" on an identity verification. The summary names the first alert and counts the rest.
To open a requirement, click the requirement you want to see more information or to view the alerts that need actioning. See Understanding statuses and alerts on a case for the full guide.
Document Expiry Alerts in the Manifest
The Manifest displays alerts when a document has expired or is due to expire within the next 12 months. You’ll see the number of months remaining until expiry once it falls below this 12-month threshold.
This applies to the following document types:
- Passport
- Driver's Licence
- National ID
- Certified Passport
- Certified Driver's Licence
These alerts help you stay on top of upcoming renewals and ensure your case documentation remains valid.