TABLE OF CONTENTS
- Who can do this
- Video walkthrough
- Video demonstration - Adding and removing users
- Add a user
- What happens next depends on whether your platform uses single sign-on (SSO)
- Remove (deactivate) a user
- Related articles
To manage user access on the First AML platform, you can add, edit or remove users from the Users tab.
Who can do this
- Access to the Users tab is limited to users with the following roles: Compliance Admin, Compliance Office Admin, Team Admin, or Office Admin.
- To learn what each role can see and do, see Understanding types of user roles.
Video walkthrough
Watch a short walkthrough of adding a new user:
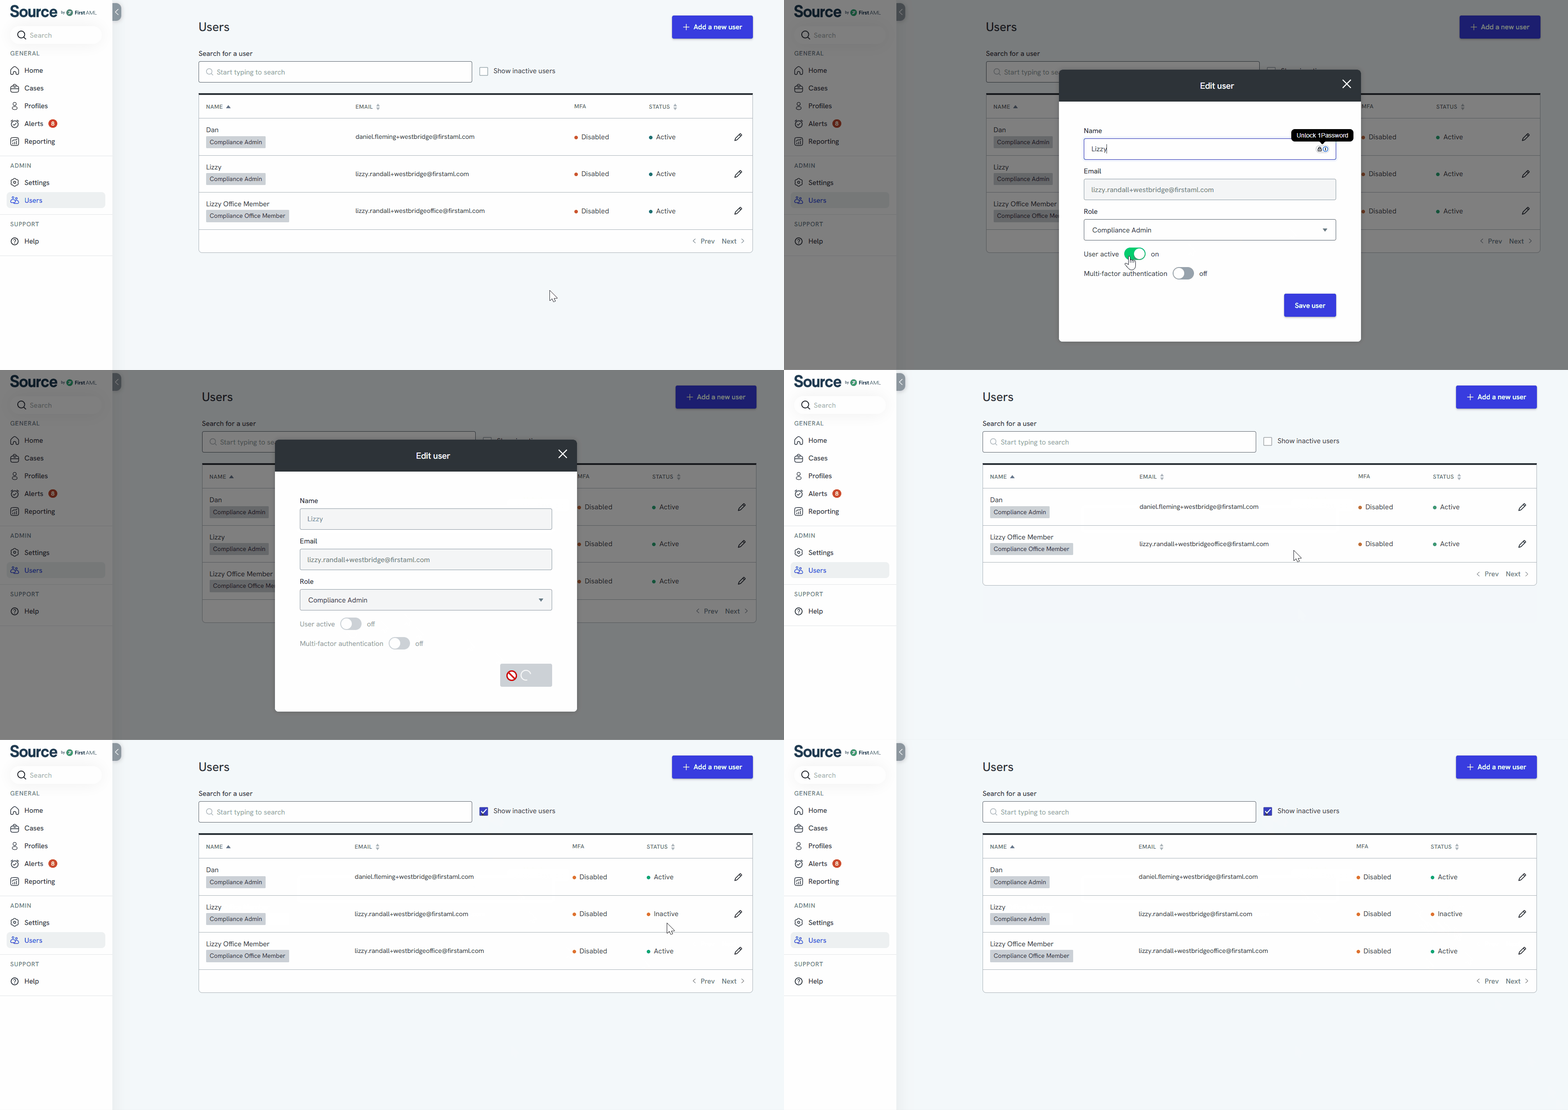
Video demonstration - Adding and removing users
Video summary: once you've received your login email and logged in for the first time, go to the Users tab on the left-hand navigation to add or manage user accounts. The Users page lists everyone with an account, along with their name, email address, role and status.
To add a new user, click Add a new user in the top right-hand corner, enter their name and email address, and select the appropriate role from the dropdown (see Understanding types of user roles for what each role can do). Click Save user and the new user appears in the list.
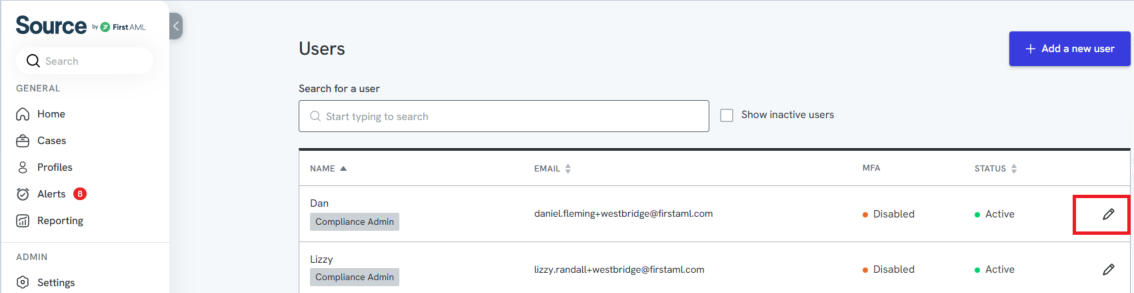
To manage an existing account, click the pencil icon next to that user. From the edit screen you can toggle their status between Active and Inactive to stop or restore their platform access, then click Save user to save the change.
The written steps below cover the same process in full, so you don't need to watch the video to complete either task.
Add a user
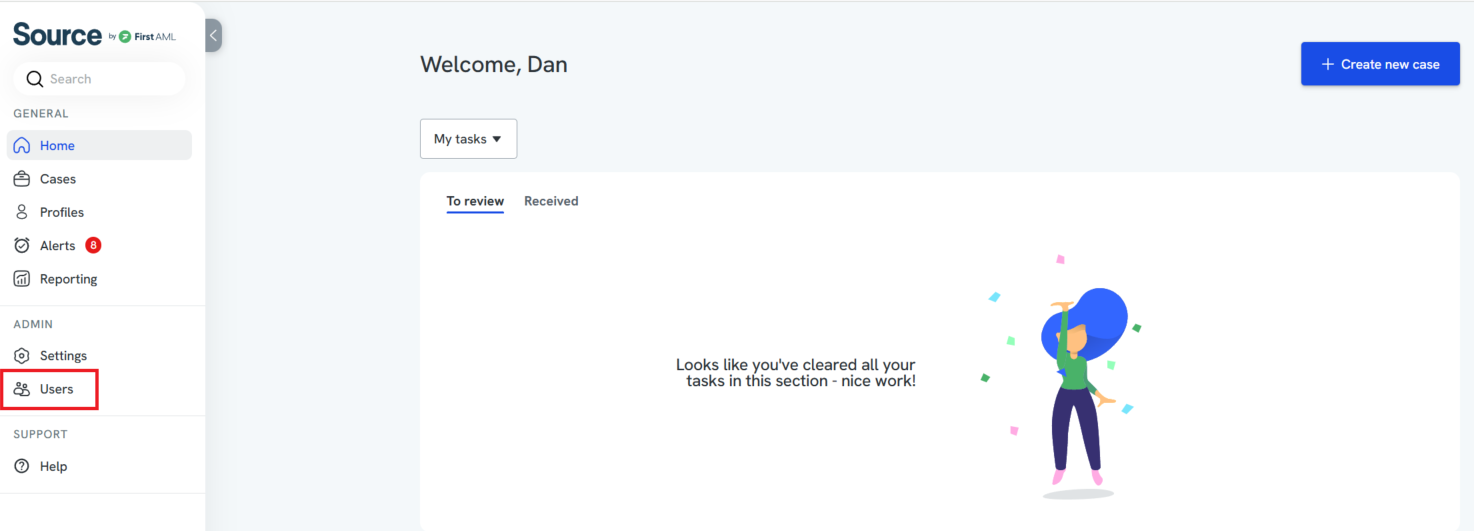
- In the left-hand navigation, under Admin, click Users.
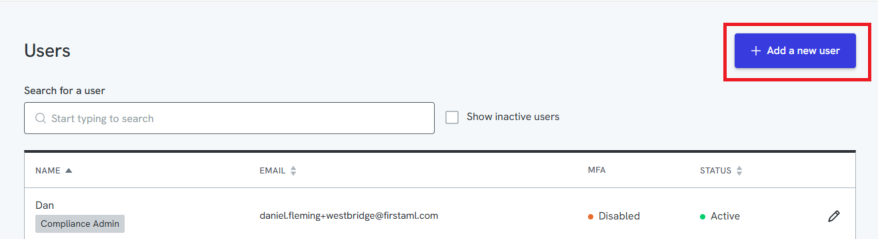
2. Click +Add a new user.
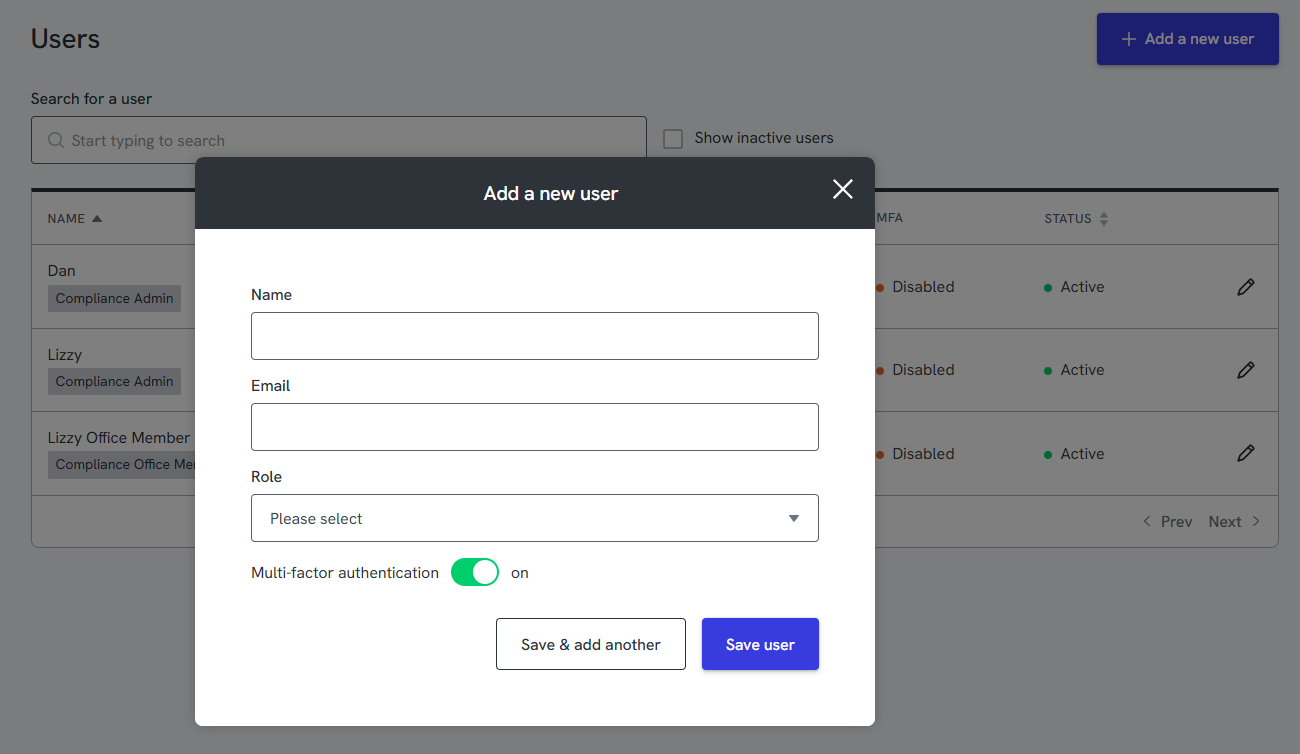
3. Enter the new user's name and company email address
4. Select their role from the role dropdown. Each role has different capabilities and access on the platform; see Understanding types of user roles for details before choosing.
5. Click Save user.
What happens next depends on whether your platform uses single sign-on (SSO):
- If your platform does not use SSO, a password activation link is sent to the new user's registered email address.
- If your platform uses SSO, the new user needs to follow the steps in Logging in with SSO to access the platform.
Remove (deactivate) a user
You deactivate a user rather than permanently delete them, so their case history and audit trail are kept.
- In the left-hand navigation, under Admin, click Users.
- Find the user you want to deactivate, then click the pencil icon on the right-hand side of their row.
3. On the edit user screen, click the toggle button at the bottom of the form to switch the user's status from "Active" to "Inactive".
4. Click Save user to complete the process.